This article shows how to implement the OpenID Connect Implicit Flow using Angular. This previous blog implemented the OAuth2 Implicit Flow which is not an authentication protocol. The OpenID Connect specification for Implicit Flow can be found here.
Code: https://github.com/damienbod/AspNet5IdentityServerAngularImplicitFlow
In the application, the SecurityService implements all the authorization, local storage, login, authorize, logoff and reset. The AuthorizationInterceptor is used to intercept the http requests, responses.
Client Authentication, User Authorization
The client authentication and user authorization is started by clicking the Login button. This calls indirectly the DoAuthorization function in the SecurityService.

The DoAuthorization is used to request the authorization and also to handle authorization callback logic. If a windows hash exists, the application knows that the login is completed and returning the token and the id_token from the login, authentication, authorization process.
var DoAuthorization = function () {
  ResetAuthorizationData();

  if ($window.location.hash) {
    authorizeCallback();
  }
  else {
    authorize();
  }
}
The authorize function is used to create the request for the OpenID login and the redirect. The /connect/authorize on IdentityServer4 is called with the parameters described in the OpenID Connect Implicit Flow specification. The scope MUST contain the openid scope, otherwise the request will fail. The response_type defines the flow which should be used. The OpenID Connect Implicit Flow requires the id_token token or the id_token definition. The supported OpenID flows are also defined in the specification.
“response_type” OpenID connect definitions:
code : Authorization Code Flow
id_token : Implicit Flow
id_token token : Implicit Flow
code id_token : Hybrid Flow
code token : Hybrid Flow
code id_token token : Hybrid Flow
All other “response_type” definitions which are supported by IdentityServer4 are not OpenID connect flows.
The nonce and state parameters for the auth request are created and saved to the local storage. The nonce and the state are used to validate the response to prevent against Cross-Site Request Forgery (CSRF, XSRF) attacks.
The redirect_uri parameter must match the definition in the IdentityServer4 project. The client_id must also match the client definition in IdentityServer4. The matching client configuration for this application can be found here.
var authorize = function () {
	console.log("AuthorizedController time to log on");

	var authorizationUrl = 'https://localhost:44345/connect/authorize';
	var client_id = 'angularclient';
	var redirect_uri = 'https://localhost:44347/authorized';
	var response_type = "id_token token";
	var scope = "dataEventRecords aReallyCoolScope openid";
	var nonce = "N" + Math.random() + "" + Date.now();
	var state = Date.now() + "" + Math.random();

	localStorageService.set("authNonce", nonce);
	localStorageService.set("authStateControl", state);
	console.log("AuthorizedController created. adding myautostate: " + localStorageService.get("authStateControl"));

	var url =
		authorizationUrl + "?" +
		"response_type=" + encodeURI(response_type) + "&" +
		"client_id=" + encodeURI(client_id) + "&" +
		"redirect_uri=" + encodeURI(redirect_uri) + "&" +
		"scope=" + encodeURI(scope) + "&" +
		"nonce=" + encodeURI(nonce) + "&" +
		"state=" + encodeURI(state);

	$window.location = url;
}
The login page:

Information about what the client is requesting:

Authorization Callback Validation
The authorizeCallback function is used to validate and process the token/id_token response. The method takes the returned hash and then validates that the nonce and also the state are the same values which were sent to IdentityServer4. The token and also the id_token are extracted from the result. The getDataFromToken function is used to get the id_token values of the response. The nonce value can then be read and validated.
var authorizeCallback = function () {
	console.log("AuthorizedController created, has hash");
	var hash = window.location.hash.substr(1);

	var result = hash.split('&').reduce(function (result, item) {
		var parts = item.split('=');
		result[parts[0]] = parts[1];
		return result;
	}, {});

	var token = "";
	var id_token = "";
	var authResponseIsValid = false;
	if (!result.error) {

			if (result.state !== localStorageService.get("authStateControl")) {
				console.log("AuthorizedCallback incorrect state");
			} else {

				token = result.access_token;
				id_token = result.id_token

				var dataIdToken = getDataFromToken(id_token);
				console.log(dataIdToken);

				// validate nonce
				if (dataIdToken.nonce !== localStorageService.get("authNonce")) {
					console.log("AuthorizedCallback incorrect nonce");
				} else {
					localStorageService.set("authNonce", "");
					localStorageService.set("authStateControl", "");

					authResponseIsValid = true;
					console.log("AuthorizedCallback state and nonce validated, returning access token");
				}
			}
	}

	if (authResponseIsValid) {
		SetAuthorizationData(token, id_token);
		console.log(localStorageService.get("authorizationData"));

		$state.go("overviewindex");
	}
	else {
		ResetAuthorizationData();
		$state.go("unauthorized");
	}
}
If the tokens are ok, the SetAuthorizationData method is used to save the token payload to the local storage. This method saves both the token and the id_token to the storage. The method also uses the token, to check if the logged on user has the admin role claim. The HasAdminRole property and the IsAuthorized property is set on the root scope as this is a required throughout the angular application.
var SetAuthorizationData = function (token, id_token) {

	if (localStorageService.get("authorizationData") !== "") {
		localStorageService.set("authorizationData", "");
	}

	localStorageService.set("authorizationData", token);
	localStorageService.set("authorizationDataIdToken", id_token);
	$rootScope.IsAuthorized = true;

	var data = getDataFromToken(token);
	for (var i = 0; i < data.role.length; i++) {
		if (data.role[i] === "dataEventRecords.admin") {
			$rootScope.HasAdminRole = true;
		}
	}
}
Using the Bearer Token
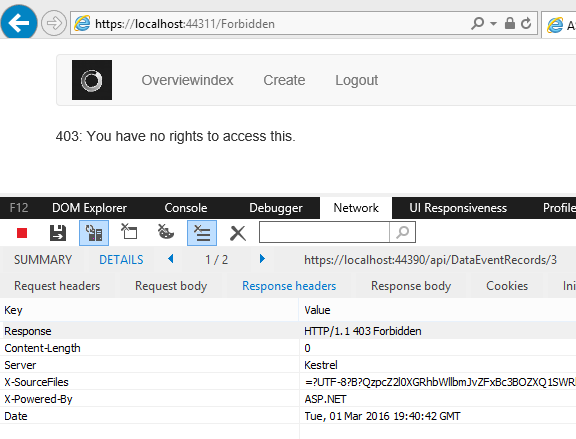
Now that the angular app has a token, an Authorization Interceptor is used to intecept all http requests and add the Bearer token to the header. If a 401 is returned, the application alerts with a unauthorized and resets the local storage. If a 403 is returned, the application redirects to the forbidden angular route.
(function () {
    'use strict';

    var module = angular.module('mainApp');

    function AuthorizationInterceptor($q, localStorageService) {

        console.log("AuthorizationInterceptor created");

        var request = function (requestSuccess) {
            requestSuccess.headers = requestSuccess.headers || {};

            if (localStorageService.get("authorizationData") !== "") {
                requestSuccess.headers.Authorization = 'Bearer ' + localStorageService.get("authorizationData");
            }

            return requestSuccess || $q.when(requestSuccess);
        };

        var responseError = function(responseFailure) {

            console.log("console.log(responseFailure);");
            console.log(responseFailure);
            if (responseFailure.status === 403) {
                alert("forbidden");
                window.location = "https://localhost:44347/forbidden";
                window.href = "forbidden";

            } else if (responseFailure.status === 401) {

                alert("unauthorized");
                localStorageService.set("authorizationData", "");
            }

            return this.q.reject(responseFailure);
        };

        return {
            request: request,
            responseError: responseError
        }
    }

    module.service("authorizationInterceptor", [
            '$q',
            'localStorageService',
            AuthorizationInterceptor
    ]);

    module.config(["$httpProvider", function ($httpProvider) {
        $httpProvider.interceptors.push("authorizationInterceptor");
    }]);

})();
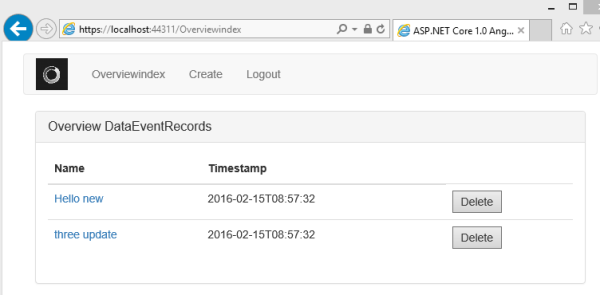
The application also only displays the data to an authorized user using the IsAuthorized angular property. A ng-if is used with the HasAdminRole property. This is read only without the admin role. If a script kiddy plays with the HTML, this does not matter as the role is validated on the server, this is just user validation, or user experience.
<div class="col-md-12"  ng-show="IsAuthorized">
    <div class="panel panel-default" >
        <div class="panel-heading">
            <h3 class="panel-title">{{message}}</h3>
        </div>
        <div class="panel-body">
            <table class="table">
                <thead>
                    <tr>
                        <th>Name</th>
                        <th>Timestamp</th>
                    </tr>
                </thead>
                <tbody>
                    <tr style="height:20px;" ng-repeat="dataEventRecord in dataEventRecords">
                        <td>
                            <a ng-if="HasAdminRole" href="/details/{{dataEventRecord.Id}}">{{dataEventRecord.Name}}</a>
                            <span ng-if="!HasAdminRole">{{dataEventRecord.Name}}</span>
                        </td>
                        <td>{{dataEventRecord.Timestamp}}</td>
                        <td><button ng-click="Delete(dataEventRecord.Id)">Delete</button></td>
                    </tr>
                </tbody>
            </table>

        </div>
    </div>
</div>

Logoff Client application, and IdentityServer4
IdentityServer4 (will) supports server logoff. This is done using the /connect/endsession endpoint in IdentityServer4. At present, this is not supported in IdentityServer4 but will be some time after the ASP.NET Core RC2 release. When implemented, the server method will be called using the specification from openID and the local storage will be reset.
var Logoff = function () {
	var id_token = localStorageService.get("authorizationDataIdToken");
	var authorizationUrl = 'https://localhost:44345/connect/endsession';
	var id_token_hint = id_token;
	var post_logout_redirect_uri = 'https://localhost:44347/unauthorized.html';
	var state = Date.now() + "" + Math.random();

	var url =
		authorizationUrl + "?" +
		"id_token_hint=" + id_token_hint + "&" +
		"post_logout_redirect_uri=" + encodeURI(post_logout_redirect_uri) + "&" +
		"state=" + encodeURI(state);

	ResetAuthorizationData();
	$window.location = url;
}
Links:
http://openid.net/specs/openid-connect-core-1_0.html
http://openid.net/specs/openid-connect-implicit-1_0.html
Announcing IdentityServer for ASP.NET 5 and .NET Core
https://github.com/IdentityServer/IdentityServer4
https://github.com/IdentityServer/IdentityServer4.Samples
The State of Security in ASP.NET 5 and MVC 6: OAuth 2.0, OpenID Connect and IdentityServer
http://connect2id.com/learn/openid-connect


