Quantcast
Channel: damienbod – Software Engineering
Viewing all 357 articles
Browse latest View live

.NET Core, ASP.NET Core logging with NLog and PostgreSQL

$
0
0

This article shows how .NET Core or ASP.NET Core applications can log to a PostgreSQL database using NLog.

Code: https://github.com/damienbod/AspNetCoreNlog

Other posts in this series:

  1. ASP.NET Core logging with NLog and Microsoft SQL Server
  2. ASP.NET Core logging with NLog and Elasticsearch
  3. Settings the NLog database connection string in the ASP.NET Core appsettings.json
  4. .NET Core logging to MySQL using NLog
  5. .NET Core logging with NLog and PostgreSQL

Setting up PostgreSQL

pgAdmin can be used to setup the PostgreSQL database which is used to save the logs. A log database was created for this demo, which matches the connection string in the nlog.config file.

Using the pgAdmin, open a query edit view and execute the following script to create a table in the log database.

CREATE TABLE logs
(
    Id serial primary key,
    Application character varying(100) NULL,
    Logged text,
    Level character varying(100) NULL,
    Message character varying(8000) NULL,
    Logger character varying(8000) NULL,
    Callsite character varying(8000) NULL,
    Exception character varying(8000) NULL
)

At present it is not possible to log a date property to PostgreSQL using NLog, only text fields are supported. A github issue exists for this here. Due to this, the Logged field is defined as a text, and uses the DateTime value when the log is created.

.NET or ASP.NET Core Application

The required packages need to be added to the csproj file. For an ASP.NET Core aplication, add NLog.Web.AspNetCore and Npgsql, for a .NET Core application add NLog and Npgsql.

<Project Sdk="Microsoft.NET.Sdk">
  <PropertyGroup>
    <TargetFramework>netcoreapp1.1</TargetFramework>
    <AssemblyName>ConsoleNLogPostgreSQL</AssemblyName>
    <OutputType>Exe</OutputType>
    <PackageId>ConsoleNLog</PackageId>
    <PackageTargetFallback>$(PackageTargetFallback);dotnet5.6;portable-net45+win8</PackageTargetFallback>
    <GenerateAssemblyConfigurationAttribute>false</GenerateAssemblyConfigurationAttribute>
    <GenerateAssemblyCompanyAttribute>false</GenerateAssemblyCompanyAttribute>
    <GenerateAssemblyProductAttribute>false</GenerateAssemblyProductAttribute>
  </PropertyGroup>
  <ItemGroup>
    <PackageReference Include="Microsoft.Extensions.Configuration.EnvironmentVariables" Version="1.1.1" />
    <PackageReference Include="Microsoft.Extensions.Configuration.FileExtensions" Version="1.1.1" />
    <PackageReference Include="Microsoft.Extensions.Configuration.Json" Version="1.1.1" />
    <PackageReference Include="Microsoft.Extensions.Logging" Version="1.1.1" />
    <PackageReference Include="Microsoft.Extensions.Logging.Console" Version="1.1.1" />
    <PackageReference Include="Microsoft.Extensions.Logging.Debug" Version="1.1.1" />
    <PackageReference Include="Microsoft.Extensions.Options.ConfigurationExtensions" Version="1.1.1" />
    <PackageReference Include="NLog.Web.AspNetCore" Version="4.3.1" />
    <PackageReference Include="Npgsql" Version="3.2.2" />
    <PackageReference Include="System.Data.SqlClient" Version="4.3.0" />
  </ItemGroup>
</Project>

Or use the NuGet package manager in Visual Studio 2017.

The nlog.config file is then setup to log to PostgreSQL using the database target with the dbProvider configured for Npgsql and the connectionString for the required instance of PostgreSQL. The commandText must match the database setup in the TSQL script. If you add, for example extra properties from the NLog.Web.AspNetCore package to the logs, these also need to be added here.

<?xml version="1.0" encoding="utf-8" ?>
<nlog xmlns="http://www.nlog-project.org/schemas/NLog.xsd"
      xmlns:xsi="http://www.w3.org/2001/XMLSchema-instance"
      autoReload="true"
      internalLogLevel="Warn"
      internalLogFile="C:\git\damienbod\AspNetCoreNlog\Logs\internal-nlog.txt">

  <targets>
    <target xsi:type="File" name="allfile" fileName="${var:configDir}\nlog-all.log"
                layout="${longdate}|${event-properties:item=EventId.Id}|${logger}|${uppercase:${level}}|${message} ${exception}" />

    <target xsi:type="File" name="ownFile-web" fileName="${var:configDir}\nlog-own.log"
             layout="${longdate}|${event-properties:item=EventId.Id}|${logger}|${uppercase:${level}}|  ${message} ${exception}" />

    <target xsi:type="Null" name="blackhole" />

    <target name="database" xsi:type="Database"
              dbProvider="Npgsql.NpgsqlConnection, Npgsql"
              connectionString="User ID=damienbod;Password=damienbod;Host=localhost;Port=5432;Database=log;Pooling=true;"
             >

          <commandText>
              insert into logs (
              Application, Logged, Level, Message,
              Logger, CallSite, Exception
              ) values (
              @Application, @Logged, @Level, @Message,
              @Logger, @Callsite, @Exception
              );
          </commandText>

          <parameter name="@application" layout="AspNetCoreNlog" />
          <parameter name="@logged" layout="${date}" />
          <parameter name="@level" layout="${level}" />
          <parameter name="@message" layout="${message}" />

          <parameter name="@logger" layout="${logger}" />
          <parameter name="@callSite" layout="${callsite:filename=true}" />
          <parameter name="@exception" layout="${exception:tostring}" />
      </target>

  </targets>

  <rules>
    <!--All logs, including from Microsoft-->
    <logger name="*" minlevel="Trace" writeTo="allfile" />

    <logger name="*" minlevel="Trace" writeTo="database" />

    <!--Skip Microsoft logs and so log only own logs-->
    <logger name="Microsoft.*" minlevel="Trace" writeTo="blackhole" final="true" />
    <logger name="*" minlevel="Trace" writeTo="ownFile-web" />
  </rules>
</nlog>

When using ASP.NET Core, the NLog.Web.AspNetCore can be added to the nlog.config file to use the extra properties provided here.

<extensions>
     <add assembly="NLog.Web.AspNetCore"/>
</extensions>

Using the log

The logger can be used using the LogManager or added to the NLog log configuration in the Startup class in an ASP.NET Core application.

Basic example:

LogManager.Configuration.Variables["configDir"] = "C:\\git\\damienbod\\AspNetCoreNlog\\Logs";

var logger = LogManager.GetLogger("console");
logger.Warn("console logging is great");
logger.Error(new ArgumentException("oh no"));

Startup configuration in an ASP.NET Core application:

public void ConfigureServices(IServiceCollection services)
{
	services.AddSingleton<IHttpContextAccessor, HttpContextAccessor>();
	// Add framework services.
	services.AddMvc();

	services.AddScoped<LogFilter>();
}

// This method gets called by the runtime. Use this method to configure the HTTP request pipeline.
public void Configure(IApplicationBuilder app, IHostingEnvironment env, ILoggerFactory loggerFactory)
{
	loggerFactory.AddNLog();

	//add NLog.Web
	app.AddNLogWeb();

	////foreach (DatabaseTarget target in LogManager.Configuration.AllTargets.Where(t => t is DatabaseTarget))
	////{
	////	target.ConnectionString = Configuration.GetConnectionString("NLogDb");
	////}

	////LogManager.ReconfigExistingLoggers();

	LogManager.Configuration.Variables["connectionString"] = Configuration.GetConnectionString("NLogDb");
	LogManager.Configuration.Variables["configDir"] = "C:\\git\\damienbod\\AspNetCoreNlog\\Logs";

	app.UseMvc();
}

When the application is run, the logs are added to the database.

Links

https://www.postgresql.org/

https://www.pgadmin.org/

https://github.com/nlog/NLog/wiki/Database-target

https://github.com/NLog/NLog.Extensions.Logging

https://github.com/NLog

https://docs.asp.net/en/latest/fundamentals/logging.html

https://msdn.microsoft.com/en-us/magazine/mt694089.aspx

https://docs.asp.net/en/latest/fundamentals/configuration.html


Implementing OpenID Implicit Flow using OpenIddict and Angular

$
0
0

This article shows how to implement the OpenID Connect Implicit Flow using OpenIddict hosted in an ASP.NET Core application, an ASP.NET Core web API and an Angular application as the client.

Code: https://github.com/damienbod/AspNetCoreOpeniddictAngularImplicitFlow

Three different projects are used to implement the application. The OpenIddict Implicit Flow Server is used to authenticate and authorise, the resource server is used to provide the API, and the Angular application implements the UI.

OpenIddict Server implementing the Implicit Flow

To use the OpenIddict NuGet packages to implement an OpenID Connect server, you need to use the myget server. You can add a NuGet.config file to your project to configure this, or add it to the package sources in Visual Studio 2017.

<?xml version="1.0" encoding="utf-8"?>
<configuration>
  <packageSources>
    <add key="NuGet" value="https://api.nuget.org/v3/index.json" />
    <add key="aspnet-contrib" value="https://www.myget.org/F/aspnet-contrib/api/v3/index.json" />
  </packageSources>
</configuration>

Then you can use the NuGet package manager to download the required packages. You need to select the key for the correct source in the drop down on the right hand side, and select the required pre-release packages.

Or you can just add them directly to the csproj file.

<Project Sdk="Microsoft.NET.Sdk.Web">

  <PropertyGroup>
    <TargetFramework>netcoreapp1.1</TargetFramework>
    <PreserveCompilationContext>true</PreserveCompilationContext>
    <OutputType>Exe</OutputType>
  </PropertyGroup>

  <ItemGroup>
    <PackageReference Include="AspNet.Security.OAuth.Validation" Version="1.0.0-rtm-0241" />
    <PackageReference Include="Microsoft.AspNetCore.Authentication.Google" Version="1.1.1" />
    <PackageReference Include="Microsoft.AspNetCore.Authentication.JwtBearer" Version="1.1.1" />
    <PackageReference Include="Microsoft.AspNetCore.Authentication.Twitter" Version="1.1.1" />
    <PackageReference Include="Microsoft.AspNetCore.Diagnostics" Version="1.1.1" />
    <PackageReference Include="Microsoft.AspNetCore.Identity.EntityFrameworkCore" Version="1.1.1" />
    <PackageReference Include="Microsoft.AspNetCore.Mvc" Version="1.1.2" />
    <PackageReference Include="Microsoft.AspNetCore.Server.IISIntegration" Version="1.1.1" />
    <PackageReference Include="Microsoft.AspNetCore.Server.Kestrel" Version="1.1.1" />
    <PackageReference Include="Microsoft.AspNetCore.Cors" Version="1.1.1" />
    <PackageReference Include="Microsoft.EntityFrameworkCore.Tools" Version="1.1.0" />
    <PackageReference Include="Microsoft.AspNetCore.Diagnostics.EntityFrameworkCore" Version="1.1.1" />
    <PackageReference Include="Microsoft.Extensions.Configuration.CommandLine" Version="1.1.1" />
    <PackageReference Include="Microsoft.Extensions.Configuration.EnvironmentVariables" Version="1.1.1" />
    <PackageReference Include="Microsoft.Extensions.Configuration.Json" Version="1.1.1" />
    <PackageReference Include="Microsoft.Extensions.Logging.Console" Version="1.1.1" />
    <PackageReference Include="Microsoft.Extensions.Logging.Debug" Version="1.1.1" />
    <PackageReference Include="Openiddict" Version="1.0.0-beta2-0598" />
    <PackageReference Include="OpenIddict.EntityFrameworkCore" Version="1.0.0-beta2-0598" />
    <PackageReference Include="OpenIddict.Mvc" Version="1.0.0-beta2-0598" />
    <PackageReference Include="Microsoft.EntityFrameworkCore.Sqlite" Version="1.1.1" />
    <PackageReference Include="Microsoft.EntityFrameworkCore.Sqlite.Design" Version="1.1.1" />
  </ItemGroup>

  <ItemGroup>
    <DotNetCliToolReference Include="Microsoft.EntityFrameworkCore.Tools.DotNet" Version="1.0.0" />
    <DotNetCliToolReference Include="Microsoft.DotNet.Watcher.Tools" Version="1.0.0" />
  </ItemGroup>

  <ItemGroup>
    <None Update="damienbodserver.pfx">
      <CopyToOutputDirectory>PreserveNewest</CopyToOutputDirectory>
    </None>
  </ItemGroup>

</Project>

The OpenIddict packages are configured in the ConfigureServices and the Configure methods in the Startup class. The following code configures the OpenID Connect Implicit Flow with a SQLite database using Entity Framework Core. The required endpoints are enabled, and Json Web tokens are used.

public void ConfigureServices(IServiceCollection services)
{
	services.AddDbContext<ApplicationDbContext>(options =>
	{
		options.UseSqlite(Configuration.GetConnectionString("DefaultConnection"));
		options.UseOpenIddict();
	});

	services.AddIdentity<ApplicationUser, IdentityRole>()
		.AddEntityFrameworkStores<ApplicationDbContext>();

	services.Configure<IdentityOptions>(options =>
	{
		options.ClaimsIdentity.UserNameClaimType = OpenIdConnectConstants.Claims.Name;
		options.ClaimsIdentity.UserIdClaimType = OpenIdConnectConstants.Claims.Subject;
		options.ClaimsIdentity.RoleClaimType = OpenIdConnectConstants.Claims.Role;
	});

	services.AddOpenIddict(options =>
	{
		options.AddEntityFrameworkCoreStores<ApplicationDbContext>();
		options.AddMvcBinders();
		options.EnableAuthorizationEndpoint("/connect/authorize")
			   .EnableLogoutEndpoint("/connect/logout")
			   .EnableIntrospectionEndpoint("/connect/introspect")
			   .EnableUserinfoEndpoint("/api/userinfo");

		options.AllowImplicitFlow();
		options.AddSigningCertificate(_cert);
		options.UseJsonWebTokens();
	});

	var policy = new Microsoft.AspNetCore.Cors.Infrastructure.CorsPolicy();

	policy.Headers.Add("*");
	policy.Methods.Add("*");
	policy.Origins.Add("*");
	policy.SupportsCredentials = true;

	services.AddCors(x => x.AddPolicy("corsGlobalPolicy", policy));

	services.AddMvc();

	services.AddTransient<IEmailSender, AuthMessageSender>();
	services.AddTransient<ISmsSender, AuthMessageSender>();
}

The Configure method defines JwtBearerAuthentication so the userinfo API can be used, or any other authorisered API. The OpenIddict middlware is also added. The commented out method InitializeAsync is used to add OpenIddict data to the existing database. The database was created using Entity Framework Core migrations from the command line.

public void Configure(IApplicationBuilder app, IHostingEnvironment env, ILoggerFactory loggerFactory)
{
	loggerFactory.AddConsole(Configuration.GetSection("Logging"));
	loggerFactory.AddDebug();

	if (env.IsDevelopment())
	{
		app.UseDeveloperExceptionPage();
		app.UseDatabaseErrorPage();
	}
	else
	{
		app.UseExceptionHandler("/Home/Error");
	}

	app.UseCors("corsGlobalPolicy");

	JwtSecurityTokenHandler.DefaultInboundClaimTypeMap.Clear();
	JwtSecurityTokenHandler.DefaultOutboundClaimTypeMap.Clear();

	var jwtOptions = new JwtBearerOptions()
	{
		AutomaticAuthenticate = true,
		AutomaticChallenge = true,
		RequireHttpsMetadata = true,
		Audience = "dataEventRecords",
		ClaimsIssuer = "https://localhost:44319/",
		TokenValidationParameters = new TokenValidationParameters
		{
			NameClaimType = OpenIdConnectConstants.Claims.Name,
			RoleClaimType = OpenIdConnectConstants.Claims.Role
		}
	};

	jwtOptions.TokenValidationParameters.ValidAudience = "dataEventRecords";
	jwtOptions.TokenValidationParameters.ValidIssuer = "https://localhost:44319/";
	jwtOptions.TokenValidationParameters.IssuerSigningKey = new RsaSecurityKey(_cert.GetRSAPrivateKey().ExportParameters(false));
	app.UseJwtBearerAuthentication(jwtOptions);

	app.UseIdentity();

	app.UseOpenIddict();

	app.UseMvcWithDefaultRoute();

	// Seed the database with the sample applications.
	// Note: in a real world application, this step should be part of a setup script.
	// InitializeAsync(app.ApplicationServices, CancellationToken.None).GetAwaiter().GetResult();
}

Entity Framework Core database migrations:

> dotnet ef migrations add test
> dotnet ef database update test

The UserinfoController controller is used to return user data to the client. The API requires a token which is validated using the JWT Bearer token validation, configured in the Startup class.
The required claims need to be added here, as the application requires. This example adds some extra role claims which are used in the Angular SPA.

using System.Threading.Tasks;
using AspNet.Security.OAuth.Validation;
using AspNet.Security.OpenIdConnect.Primitives;
using OpeniddictServer.Models;
using Microsoft.AspNetCore.Authorization;
using Microsoft.AspNetCore.Identity;
using Microsoft.AspNetCore.Mvc;
using Newtonsoft.Json.Linq;
using System.Collections.Generic;

namespace OpeniddictServer.Controllers
{
    [Route("api")]
    public class UserinfoController : Controller
    {
        private readonly UserManager<ApplicationUser> _userManager;

        public UserinfoController(UserManager<ApplicationUser> userManager)
        {
            _userManager = userManager;
        }

        //
        // GET: /api/userinfo
        [Authorize(ActiveAuthenticationSchemes = OAuthValidationDefaults.AuthenticationScheme)]
        [HttpGet("userinfo"), Produces("application/json")]
        public async Task<IActionResult> Userinfo()
        {
            var user = await _userManager.GetUserAsync(User);
            if (user == null)
            {
                return BadRequest(new OpenIdConnectResponse
                {
                    Error = OpenIdConnectConstants.Errors.InvalidGrant,
                    ErrorDescription = "The user profile is no longer available."
                });
            }

            var claims = new JObject();
            claims[OpenIdConnectConstants.Claims.Subject] = await _userManager.GetUserIdAsync(user);

            if (User.HasClaim(OpenIdConnectConstants.Claims.Scope, OpenIdConnectConstants.Scopes.Email))
            {
                claims[OpenIdConnectConstants.Claims.Email] = await _userManager.GetEmailAsync(user);
                claims[OpenIdConnectConstants.Claims.EmailVerified] = await _userManager.IsEmailConfirmedAsync(user);
            }

            if (User.HasClaim(OpenIdConnectConstants.Claims.Scope, OpenIdConnectConstants.Scopes.Phone))
            {
                claims[OpenIdConnectConstants.Claims.PhoneNumber] = await _userManager.GetPhoneNumberAsync(user);
                claims[OpenIdConnectConstants.Claims.PhoneNumberVerified] = await _userManager.IsPhoneNumberConfirmedAsync(user);
            }

            List<string> roles = new List<string> { "dataEventRecords", "dataEventRecords.admin", "admin", "dataEventRecords.user" };
            claims["role"] = JArray.FromObject(roles);

            return Json(claims);
        }
    }
}

The AuthorizationController controller implements the CreateTicketAsync method where the claims can be added to the tokens as required. The Implict Flow in this example requires both the id_token and the access_token and extra claims are added to the access_token. These are the claims used by the resource server to set the policies.

private async Task<AuthenticationTicket> CreateTicketAsync(OpenIdConnectRequest request, ApplicationUser user)
{
	var identity = new ClaimsIdentity(OpenIdConnectServerDefaults.AuthenticationScheme);

	var principal = await _signInManager.CreateUserPrincipalAsync(user);
	foreach (var claim in principal.Claims)
	{
		if (claim.Type == _identityOptions.Value.ClaimsIdentity.SecurityStampClaimType)
		{
			continue;
		}

		var destinations = new List<string>
		{
			OpenIdConnectConstants.Destinations.AccessToken
		};

		if ((claim.Type == OpenIdConnectConstants.Claims.Name) ||
			(claim.Type == OpenIdConnectConstants.Claims.Email) ||
			(claim.Type == OpenIdConnectConstants.Claims.Role)  )
		{
			destinations.Add(OpenIdConnectConstants.Destinations.IdentityToken);
		}

		claim.SetDestinations(destinations);

		identity.AddClaim(claim);
	}

	// Add custom claims
	var claimdataEventRecordsAdmin = new Claim("role", "dataEventRecords.admin");
	claimdataEventRecordsAdmin.SetDestinations(OpenIdConnectConstants.Destinations.AccessToken);

	var claimAdmin = new Claim("role", "admin");
	claimAdmin.SetDestinations(OpenIdConnectConstants.Destinations.AccessToken);

	var claimUser = new Claim("role", "dataEventRecords.user");
	claimUser.SetDestinations(OpenIdConnectConstants.Destinations.AccessToken);

	identity.AddClaim(claimdataEventRecordsAdmin);
	identity.AddClaim(claimAdmin);
	identity.AddClaim(claimUser);

	// Create a new authentication ticket holding the user identity.
	var ticket = new AuthenticationTicket(new ClaimsPrincipal(identity),
	new AuthenticationProperties(),
	OpenIdConnectServerDefaults.AuthenticationScheme);

	// Set the list of scopes granted to the client application.
	ticket.SetScopes(new[]
	{
		OpenIdConnectConstants.Scopes.OpenId,
		OpenIdConnectConstants.Scopes.Email,
		OpenIdConnectConstants.Scopes.Profile,
		"role",
		"dataEventRecords"
	}.Intersect(request.GetScopes()));

	ticket.SetResources("dataEventRecords");

	return ticket;
}

If you require more examples, or different flows, refer to the excellent openiddict-samples .

Angular Implicit Flow client

The Angular application uses the AuthConfiguration class to set the options required for the OpenID Connect Implicit Flow. The ‘id_token token’ is defined as the response type so that an access_token is returned as well as the id_token. The jwks_url is required so that the client can ge the signiture from the server to validate the token. The userinfo_url and the logoutEndSession_url are used to define the user data url and the logout url. These could be removed and the data from the jwks_url could be ued to get these parameters. The configuration here has to match the configuration on the server.

import { Injectable } from '@angular/core';

@Injectable()
export class AuthConfiguration {

    // The Issuer Identifier for the OpenID Provider (which is typically obtained during Discovery) MUST exactly match the value of the iss (issuer) Claim.
    public iss = 'https://localhost:44319/';

    public server = 'https://localhost:44319';

    public redirect_url = 'https://localhost:44308';

    // This is required to get the signing keys so that the signiture of the Jwt can be validated.
    public jwks_url = 'https://localhost:44319/.well-known/jwks';

    public userinfo_url = 'https://localhost:44319/api/userinfo';

    public logoutEndSession_url = 'https://localhost:44319/connect/logout';

    // The Client MUST validate that the aud (audience) Claim contains its client_id value registered at the Issuer identified by the iss (issuer) Claim as an audience.
    // The ID Token MUST be rejected if the ID Token does not list the Client as a valid audience, or if it contains additional audiences not trusted by the Client.
    public client_id = 'angular4client';

    public response_type = 'id_token token';

    public scope = 'dataEventRecords openid';

    public post_logout_redirect_uri = 'https://localhost:44308/Unauthorized';
}

The OidcSecurityService is used to send the login request to the server and also handle the callback which validates the tokens. This class also persists the token data to the local storage.

import { Injectable } from '@angular/core';
import { Http, Response, Headers } from '@angular/http';
import 'rxjs/add/operator/map';
import 'rxjs/add/operator/catch';
import { Observable } from 'rxjs/Rx';
import { Router } from '@angular/router';
import { AuthConfiguration } from '../auth.configuration';
import { OidcSecurityValidation } from './oidc.security.validation';
import { JwtKeys } from './jwtkeys';

@Injectable()
export class OidcSecurityService {

    public HasAdminRole: boolean;
    public HasUserAdminRole: boolean;
    public UserData: any;

    private _isAuthorized: boolean;
    private actionUrl: string;
    private headers: Headers;
    private storage: any;
    private oidcSecurityValidation: OidcSecurityValidation;

    private errorMessage: string;
    private jwtKeys: JwtKeys;

    constructor(private _http: Http, private _configuration: AuthConfiguration, private _router: Router) {

        this.actionUrl = _configuration.server + 'api/DataEventRecords/';
        this.oidcSecurityValidation = new OidcSecurityValidation();

        this.headers = new Headers();
        this.headers.append('Content-Type', 'application/json');
        this.headers.append('Accept', 'application/json');
        this.storage = sessionStorage; //localStorage;

        if (this.retrieve('_isAuthorized') !== '') {
            this.HasAdminRole = this.retrieve('HasAdminRole');
            this._isAuthorized = this.retrieve('_isAuthorized');
        }
    }

    public IsAuthorized(): boolean {
        if (this._isAuthorized) {
            if (this.oidcSecurityValidation.IsTokenExpired(this.retrieve('authorizationDataIdToken'))) {
                console.log('IsAuthorized: isTokenExpired');
                this.ResetAuthorizationData();
                return false;
            }

            return true;
        }

        return false;
    }

    public GetToken(): any {
        return this.retrieve('authorizationData');
    }

    public ResetAuthorizationData() {
        this.store('authorizationData', '');
        this.store('authorizationDataIdToken', '');

        this._isAuthorized = false;
        this.HasAdminRole = false;
        this.store('HasAdminRole', false);
        this.store('_isAuthorized', false);
    }

    public SetAuthorizationData(token: any, id_token: any) {
        if (this.retrieve('authorizationData') !== '') {
            this.store('authorizationData', '');
        }

        console.log(token);
        console.log(id_token);
        console.log('storing to storage, getting the roles');
        this.store('authorizationData', token);
        this.store('authorizationDataIdToken', id_token);
        this._isAuthorized = true;
        this.store('_isAuthorized', true);

        this.getUserData()
            .subscribe(data => this.UserData = data,
            error => this.HandleError(error),
            () => {
                for (let i = 0; i < this.UserData.role.length; i++) {
                    console.log(this.UserData.role[i]);
                    if (this.UserData.role[i] === 'dataEventRecords.admin') {
                        this.HasAdminRole = true;
                        this.store('HasAdminRole', true);
                    }
                    if (this.UserData.role[i] === 'admin') {
                        this.HasUserAdminRole = true;
                        this.store('HasUserAdminRole', true);
                    }
                }
            });
    }

    public Authorize() {
        this.ResetAuthorizationData();

        console.log('BEGIN Authorize, no auth data');

        let authorizationUrl = this._configuration.server + '/connect/authorize';
        let client_id = this._configuration.client_id;
        let redirect_uri = this._configuration.redirect_url;
        let response_type = this._configuration.response_type;
        let scope = this._configuration.scope;
        let nonce = 'N' + Math.random() + '' + Date.now();
        let state = Date.now() + '' + Math.random();

        this.store('authStateControl', state);
        this.store('authNonce', nonce);
        console.log('AuthorizedController created. adding myautostate: ' + this.retrieve('authStateControl'));

        let url =
            authorizationUrl + '?' +
            'response_type=' + encodeURI(response_type) + '&' +
            'client_id=' + encodeURI(client_id) + '&' +
            'redirect_uri=' + encodeURI(redirect_uri) + '&' +
            'scope=' + encodeURI(scope) + '&' +
            'nonce=' + encodeURI(nonce) + '&' +
            'state=' + encodeURI(state);

        window.location.href = url;
    }

    public AuthorizedCallback() {
        console.log('BEGIN AuthorizedCallback, no auth data');
        this.ResetAuthorizationData();

        let hash = window.location.hash.substr(1);

        let result: any = hash.split('&').reduce(function (result: any, item: string) {
            let parts = item.split('=');
            result[parts[0]] = parts[1];
            return result;
        }, {});

        console.log(result);
        console.log('AuthorizedCallback created, begin token validation');

        let token = '';
        let id_token = '';
        let authResponseIsValid = false;

        this.getSigningKeys()
            .subscribe(jwtKeys => {
                this.jwtKeys = jwtKeys;

                if (!result.error) {

                    // validate state
                    if (this.oidcSecurityValidation.ValidateStateFromHashCallback(result.state, this.retrieve('authStateControl'))) {
                        token = result.access_token;
                        id_token = result.id_token;
                        let decoded: any;
                        let headerDecoded;
                        decoded = this.oidcSecurityValidation.GetPayloadFromToken(id_token, false);
                        headerDecoded = this.oidcSecurityValidation.GetHeaderFromToken(id_token, false);

                        // validate jwt signature
                        if (this.oidcSecurityValidation.Validate_signature_id_token(id_token, this.jwtKeys)) {
                            // validate nonce
                            if (this.oidcSecurityValidation.Validate_id_token_nonce(decoded, this.retrieve('authNonce'))) {
                                // validate iss
                                if (this.oidcSecurityValidation.Validate_id_token_iss(decoded, this._configuration.iss)) {
                                    // validate aud
                                    if (this.oidcSecurityValidation.Validate_id_token_aud(decoded, this._configuration.client_id)) {
                                        // valiadate at_hash and access_token
                                        if (this.oidcSecurityValidation.Validate_id_token_at_hash(token, decoded.at_hash) || !token) {
                                            this.store('authNonce', '');
                                            this.store('authStateControl', '');

                                            authResponseIsValid = true;
                                            console.log('AuthorizedCallback state, nonce, iss, aud, signature validated, returning token');
                                        } else {
                                            console.log('AuthorizedCallback incorrect aud');
                                        }
                                    } else {
                                        console.log('AuthorizedCallback incorrect aud');
                                    }
                                } else {
                                    console.log('AuthorizedCallback incorrect iss');
                                }
                            } else {
                                console.log('AuthorizedCallback incorrect nonce');
                            }
                        } else {
                            console.log('AuthorizedCallback incorrect Signature id_token');
                        }
                    } else {
                        console.log('AuthorizedCallback incorrect state');
                    }
                }

                if (authResponseIsValid) {
                    this.SetAuthorizationData(token, id_token);
                    console.log(this.retrieve('authorizationData'));

                    // router navigate to DataEventRecordsList
                    this._router.navigate(['/dataeventrecords/list']);
                } else {
                    this.ResetAuthorizationData();
                    this._router.navigate(['/Unauthorized']);
                }
            });
    }

    public Logoff() {
        // /connect/endsession?id_token_hint=...&post_logout_redirect_uri=https://myapp.com
        console.log('BEGIN Authorize, no auth data');

        let authorizationEndsessionUrl = this._configuration.logoutEndSession_url;

        let id_token_hint = this.retrieve('authorizationDataIdToken');
        let post_logout_redirect_uri = this._configuration.post_logout_redirect_uri;

        let url =
            authorizationEndsessionUrl + '?' +
            'id_token_hint=' + encodeURI(id_token_hint) + '&' +
            'post_logout_redirect_uri=' + encodeURI(post_logout_redirect_uri);

        this.ResetAuthorizationData();

        window.location.href = url;
    }

    private runGetSigningKeys() {
        this.getSigningKeys()
            .subscribe(
            jwtKeys => this.jwtKeys = jwtKeys,
            error => this.errorMessage = <any>error);
    }

    private getSigningKeys(): Observable<JwtKeys> {
        return this._http.get(this._configuration.jwks_url)
            .map(this.extractData)
            .catch(this.handleError);
    }

    private extractData(res: Response) {
        let body = res.json();
        return body;
    }

    private handleError(error: Response | any) {
        // In a real world app, you might use a remote logging infrastructure
        let errMsg: string;
        if (error instanceof Response) {
            const body = error.json() || '';
            const err = body.error || JSON.stringify(body);
            errMsg = `${error.status} - ${error.statusText || ''} ${err}`;
        } else {
            errMsg = error.message ? error.message : error.toString();
        }
        console.error(errMsg);
        return Observable.throw(errMsg);
    }

    public HandleError(error: any) {
        console.log(error);
        if (error.status == 403) {
            this._router.navigate(['/Forbidden']);
        } else if (error.status == 401) {
            this.ResetAuthorizationData();
            this._router.navigate(['/Unauthorized']);
        }
    }

    private retrieve(key: string): any {
        let item = this.storage.getItem(key);

        if (item && item !== 'undefined') {
            return JSON.parse(this.storage.getItem(key));
        }

        return;
    }

    private store(key: string, value: any) {
        this.storage.setItem(key, JSON.stringify(value));
    }

    private getUserData = (): Observable<string[]> => {
        this.setHeaders();
        return this._http.get(this._configuration.userinfo_url, {
            headers: this.headers,
            body: ''
        }).map(res => res.json());
    }

    private setHeaders() {
        this.headers = new Headers();
        this.headers.append('Content-Type', 'application/json');
        this.headers.append('Accept', 'application/json');

        let token = this.GetToken();

        if (token !== '') {
            this.headers.append('Authorization', 'Bearer ' + token);
        }
    }
}

The OidcSecurityValidation class defines the functions used to validate the tokens defined in the OpenID Connect specification for the Implicit Flow.

import { Injectable } from '@angular/core';

// from jsrasiign
declare var KJUR: any;
declare var KEYUTIL: any;
declare var hextob64u: any;

// http://openid.net/specs/openid-connect-implicit-1_0.html

// id_token
//// id_token C1: The Issuer Identifier for the OpenID Provider (which is typically obtained during Discovery) MUST exactly match the value of the iss (issuer) Claim.
//// id_token C2: The Client MUST validate that the aud (audience) Claim contains its client_id value registered at the Issuer identified by the iss (issuer) Claim as an audience.The ID Token MUST be rejected if the ID Token does not list the Client as a valid audience, or if it contains additional audiences not trusted by the Client.
// id_token C3: If the ID Token contains multiple audiences, the Client SHOULD verify that an azp Claim is present.
// id_token C4: If an azp (authorized party) Claim is present, the Client SHOULD verify that its client_id is the Claim Value.
//// id_token C5: The Client MUST validate the signature of the ID Token according to JWS [JWS] using the algorithm specified in the alg Header Parameter of the JOSE Header. The Client MUST use the keys provided by the Issuer.
//// id_token C6: The alg value SHOULD be RS256. Validation of tokens using other signing algorithms is described in the OpenID Connect Core 1.0 [OpenID.Core] specification.
//// id_token C7: The current time MUST be before the time represented by the exp Claim (possibly allowing for some small leeway to account for clock skew).
// id_token C8: The iat Claim can be used to reject tokens that were issued too far away from the current time, limiting the amount of time that nonces need to be stored to prevent attacks.The acceptable range is Client specific.
//// id_token C9: The value of the nonce Claim MUST be checked to verify that it is the same value as the one that was sent in the Authentication Request.The Client SHOULD check the nonce value for replay attacks.The precise method for detecting replay attacks is Client specific.
// id_token C10: If the acr Claim was requested, the Client SHOULD check that the asserted Claim Value is appropriate.The meaning and processing of acr Claim Values is out of scope for this document.
// id_token C11: When a max_age request is made, the Client SHOULD check the auth_time Claim value and request re- authentication if it determines too much time has elapsed since the last End- User authentication.

//// Access Token Validation
//// access_token C1: Hash the octets of the ASCII representation of the access_token with the hash algorithm specified in JWA[JWA] for the alg Header Parameter of the ID Token's JOSE Header. For instance, if the alg is RS256, the hash algorithm used is SHA-256.
//// access_token C2: Take the left- most half of the hash and base64url- encode it.
//// access_token C3: The value of at_hash in the ID Token MUST match the value produced in the previous step if at_hash is present in the ID Token.

@Injectable()
export class OidcSecurityValidation {

    // id_token C7: The current time MUST be before the time represented by the exp Claim (possibly allowing for some small leeway to account for clock skew).
    public IsTokenExpired(token: string, offsetSeconds?: number): boolean {

        let decoded: any;
        decoded = this.GetPayloadFromToken(token, false);

        let tokenExpirationDate = this.getTokenExpirationDate(decoded);
        offsetSeconds = offsetSeconds || 0;

        if (tokenExpirationDate == null) {
            return false;
        }

        // Token expired?
        return !(tokenExpirationDate.valueOf() > (new Date().valueOf() + (offsetSeconds * 1000)));
    }

    // id_token C9: The value of the nonce Claim MUST be checked to verify that it is the same value as the one that was sent in the Authentication Request.The Client SHOULD check the nonce value for replay attacks.The precise method for detecting replay attacks is Client specific.
    public Validate_id_token_nonce(dataIdToken: any, local_nonce: any): boolean {
        if (dataIdToken.nonce !== local_nonce) {
            console.log('Validate_id_token_nonce failed');
            return false;
        }

        return true;
    }

    // id_token C1: The Issuer Identifier for the OpenID Provider (which is typically obtained during Discovery) MUST exactly match the value of the iss (issuer) Claim.
    public Validate_id_token_iss(dataIdToken: any, client_id: any): boolean {
        if (dataIdToken.iss !== client_id) {
            console.log('Validate_id_token_iss failed');
            return false;
        }

        return true;
    }

    // id_token C2: The Client MUST validate that the aud (audience) Claim contains its client_id value registered at the Issuer identified by the iss (issuer) Claim as an audience.
    // The ID Token MUST be rejected if the ID Token does not list the Client as a valid audience, or if it contains additional audiences not trusted by the Client.
    public Validate_id_token_aud(dataIdToken: any, aud: any): boolean {
        if (dataIdToken.aud !== aud) {
            console.log('Validate_id_token_aud failed');
            return false;
        }

        return true;
    }

    public ValidateStateFromHashCallback(state: any, local_state: any): boolean {
        if (state !== local_state) {
            console.log('ValidateStateFromHashCallback failed');
            return false;
        }

        return true;
    }

    public GetPayloadFromToken(token: any, encode: boolean) {
        let data = {};
        if (typeof token !== 'undefined') {
            let encoded = token.split('.')[1];
            if (encode) {
                return encoded;
            }
            data = JSON.parse(this.urlBase64Decode(encoded));
        }

        return data;
    }

    public GetHeaderFromToken(token: any, encode: boolean) {
        let data = {};
        if (typeof token !== 'undefined') {
            let encoded = token.split('.')[0];
            if (encode) {
                return encoded;
            }
            data = JSON.parse(this.urlBase64Decode(encoded));
        }

        return data;
    }

    public GetSignatureFromToken(token: any, encode: boolean) {
        let data = {};
        if (typeof token !== 'undefined') {
            let encoded = token.split('.')[2];
            if (encode) {
                return encoded;
            }
            data = JSON.parse(this.urlBase64Decode(encoded));
        }

        return data;
    }

    // id_token C5: The Client MUST validate the signature of the ID Token according to JWS [JWS] using the algorithm specified in the alg Header Parameter of the JOSE Header. The Client MUST use the keys provided by the Issuer.
    // id_token C6: The alg value SHOULD be RS256. Validation of tokens using other signing algorithms is described in the OpenID Connect Core 1.0 [OpenID.Core] specification.
    public Validate_signature_id_token(id_token: any, jwtkeys: any): boolean {

        if (!jwtkeys || !jwtkeys.keys) {
            return false;
        }

        let header_data = this.GetHeaderFromToken(id_token, false);
        let kid = header_data.kid;
        let alg = header_data.alg;

        if ('RS256' != alg) {
            console.log('Only RS256 supported');
            return false;
        }

        let isValid = false;

        for (let key of jwtkeys.keys) {
            if (key.kid === kid) {
                let publickey = KEYUTIL.getKey(key);
                isValid = KJUR.jws.JWS.verify(id_token, publickey, ['RS256']);
                return isValid;
            }
        }

        return isValid;
    }

    // Access Token Validation
    // access_token C1: Hash the octets of the ASCII representation of the access_token with the hash algorithm specified in JWA[JWA] for the alg Header Parameter of the ID Token's JOSE Header. For instance, if the alg is RS256, the hash algorithm used is SHA-256.
    // access_token C2: Take the left- most half of the hash and base64url- encode it.
    // access_token C3: The value of at_hash in the ID Token MUST match the value produced in the previous step if at_hash is present in the ID Token.
    public Validate_id_token_at_hash(access_token: any, at_hash: any): boolean {

        let hash = KJUR.crypto.Util.hashString(access_token, 'sha256');
        let first128bits = hash.substr(0, hash.length / 2);
        let testdata = hextob64u(first128bits);

        if (testdata === at_hash) {
            return true; // isValid;
        }

        return false;
    }

    private getTokenExpirationDate(dataIdToken: any): Date {
        if (!dataIdToken.hasOwnProperty('exp')) {
            return null;
        }

        let date = new Date(0); // The 0 here is the key, which sets the date to the epoch
        date.setUTCSeconds(dataIdToken.exp);

        return date;
    }


    private urlBase64Decode(str: string) {
        let output = str.replace('-', '+').replace('_', '/');
        switch (output.length % 4) {
            case 0:
                break;
            case 2:
                output += '==';
                break;
            case 3:
                output += '=';
                break;
            default:
                throw 'Illegal base64url string!';
        }

        return window.atob(output);
    }
}

The jsrsasign is used to validate the token signature and is added to the html file as a link.

!doctype html>
<html>
<head>
    <base href="./">
    <meta charset="utf-8" />
    <meta name="viewport" content="width=device-width, initial-scale=1.0" />
    <title>ASP.NET Core 1.0 Angular IdentityServer4 Client</title>
    <meta http-equiv="content-type" content="text/html; charset=utf-8" />

	<script src="assets/jsrsasign.min.js"></script>
</head>
<body>
    <my-app>Loading...</my-app>
</body>
</html>

Once logged into the application, the access_token is added to the header of each request and sent to the resource server or the required APIs on the OpenIddict server.

 private setHeaders() {

        console.log('setHeaders started');

        this.headers = new Headers();
        this.headers.append('Content-Type', 'application/json');
        this.headers.append('Accept', 'application/json');
        this.headers.append('Cache-Control', 'no-cache');

        let token = this._securityService.GetToken();
        if (token !== '') {
            let tokenValue = 'Bearer ' + token;
            console.log('tokenValue:' + tokenValue);
            this.headers.append('Authorization', tokenValue);
        }
    }

ASP.NET Core Resource Server API

The resource server provides an API protected by security policies, dataEventRecordsUser and dataEventRecordsAdmin.

using AspNet5SQLite.Model;
using AspNet5SQLite.Repositories;

using Microsoft.AspNetCore.Authorization;
using Microsoft.AspNetCore.Mvc;

namespace AspNet5SQLite.Controllers
{
    [Authorize]
    [Route("api/[controller]")]
    public class DataEventRecordsController : Controller
    {
        private readonly IDataEventRecordRepository _dataEventRecordRepository;

        public DataEventRecordsController(IDataEventRecordRepository dataEventRecordRepository)
        {
            _dataEventRecordRepository = dataEventRecordRepository;
        }

        [Authorize("dataEventRecordsUser")]
        [HttpGet]
        public IActionResult Get()
        {
            return Ok(_dataEventRecordRepository.GetAll());
        }

        [Authorize("dataEventRecordsAdmin")]
        [HttpGet("{id}")]
        public IActionResult Get(long id)
        {
            return Ok(_dataEventRecordRepository.Get(id));
        }

        [Authorize("dataEventRecordsAdmin")]
        [HttpPost]
        public void Post([FromBody]DataEventRecord value)
        {
            _dataEventRecordRepository.Post(value);
        }

        [Authorize("dataEventRecordsAdmin")]
        [HttpPut("{id}")]
        public void Put(long id, [FromBody]DataEventRecord value)
        {
            _dataEventRecordRepository.Put(id, value);
        }

        [Authorize("dataEventRecordsAdmin")]
        [HttpDelete("{id}")]
        public void Delete(long id)
        {
            _dataEventRecordRepository.Delete(id);
        }
    }
}

The policies are implemented in the Startup class and are implemented using the role claims dataEventRecords.user, dataEventRecords.admin and the scope dataEventRecords.

var guestPolicy = new AuthorizationPolicyBuilder()
	.RequireAuthenticatedUser()
	.RequireClaim("scope", "dataEventRecords")
	.Build();

services.AddAuthorization(options =>
{
	options.AddPolicy("dataEventRecordsAdmin", policyAdmin =>
	{
		policyAdmin.RequireClaim("role", "dataEventRecords.admin");
	});
	options.AddPolicy("dataEventRecordsUser", policyUser =>
	{
		policyUser.RequireClaim("role",  "dataEventRecords.user");
	});

});

Jwt Bearer Authentication is used to validate the API HTTP requests.

JwtSecurityTokenHandler.DefaultInboundClaimTypeMap.Clear();
JwtSecurityTokenHandler.DefaultOutboundClaimTypeMap.Clear();

app.UseJwtBearerAuthentication(new JwtBearerOptions
{
	Authority = "https://localhost:44319/",
	Audience = "dataEventRecords",
	RequireHttpsMetadata = true,
	TokenValidationParameters = new TokenValidationParameters
	{
		NameClaimType = OpenIdConnectConstants.Claims.Subject,
		RoleClaimType = OpenIdConnectConstants.Claims.Role
	}
});

Running the application

When the application is started, all 3 applications are run, using the Visual Studio 2017 multiple project start option.

After the user clicks the login button, the user is redirected to the OpenIddict server to login.

After a successful login, the user is redirected back to the Angular application.

Links:

https://github.com/openiddict/openiddict-core

http://kevinchalet.com/2016/07/13/creating-your-own-openid-connect-server-with-asos-implementing-the-authorization-code-and-implicit-flows/

https://github.com/openiddict/openiddict-core/issues/49

https://github.com/openiddict/openiddict-samples

https://blogs.msdn.microsoft.com/webdev/2017/01/23/asp-net-core-authentication-with-identityserver4/

https://blogs.msdn.microsoft.com/webdev/2016/10/27/bearer-token-authentication-in-asp-net-core/

https://blogs.msdn.microsoft.com/webdev/2017/04/06/jwt-validation-and-authorization-in-asp-net-core/

https://jwt.io/

https://www.scottbrady91.com/OpenID-Connect/OpenID-Connect-Flows


ASP.NET Core IdentityServer4 Resource Owner Password Flow with custom UserRepository

$
0
0

This article shows how a custom user store or repository can be used in IdentityServer4. This can be used for an existing user management system which doesn’t use Identity or request user data from a custom source. The Resource Owner Flow using refresh tokens is used to access the protected data on the resource server. The client is implemented using IdentityModel.

Code: https://github.com/damienbod/AspNetCoreIdentityServer4ResourceOwnerPassword

Setting up a custom User Repository in IdentityServer4

To create a custom user store, an extension method needs to be created which can be added to the AddIdentityServer() builder. The .AddCustomUserStore() adds everything required for the custom user management.

services.AddIdentityServer()
		.AddSigningCredential(cert)
		.AddInMemoryIdentityResources(Config.GetIdentityResources())
		.AddInMemoryApiResources(Config.GetApiResources())
		.AddInMemoryClients(Config.GetClients())
		.AddCustomUserStore();
}

The extension method adds the required classes to the ASP.NET Core dependency injection services. A user respository is used to access the user data, a custom profile service is added to add the required claims to the tokens, and a validator is also added to validate the user credentials.

using CustomIdentityServer4.UserServices;

namespace Microsoft.Extensions.DependencyInjection
{
    public static class CustomIdentityServerBuilderExtensions
    {
        public static IIdentityServerBuilder AddCustomUserStore(this IIdentityServerBuilder builder)
        {
            builder.Services.AddSingleton<IUserRepository, UserRepository>();
            builder.AddProfileService<CustomProfileService>();
            builder.AddResourceOwnerValidator<CustomResourceOwnerPasswordValidator>();

            return builder;
        }
    }
}

The IUserRepository interface adds everything required by the application to use the custom user store throughout the IdentityServer4 application. The different views, controllers, use this interface as required. This can then be changed as required.

namespace CustomIdentityServer4.UserServices
{
    public interface IUserRepository
    {
        bool ValidateCredentials(string username, string password);

        CustomUser FindBySubjectId(string subjectId);

        CustomUser FindByUsername(string username);
    }
}

The CustomUser class is the the user class. This class can be changed to map the user data defined in the persistence medium.

namespace CustomIdentityServer4.UserServices
{
    public class CustomUser
    {
            public string SubjectId { get; set; }
            public string Email { get; set; }
            public string UserName { get; set; }
            public string Password { get; set; }
    }
}

The UserRepository implements the IUserRepository interface. Dummy users are added in this example to test. If you using a custom database, or dapper, or whatever, you could implement the data access logic in this class.

using System.Collections.Generic;
using System.Linq;
using System;

namespace CustomIdentityServer4.UserServices
{
    public class UserRepository : IUserRepository
    {
        // some dummy data. Replce this with your user persistence.
        private readonly List<CustomUser> _users = new List<CustomUser>
        {
            new CustomUser{
                SubjectId = "123",
                UserName = "damienbod",
                Password = "damienbod",
                Email = "damienbod@email.ch"
            },
            new CustomUser{
                SubjectId = "124",
                UserName = "raphael",
                Password = "raphael",
                Email = "raphael@email.ch"
            },
        };

        public bool ValidateCredentials(string username, string password)
        {
            var user = FindByUsername(username);
            if (user != null)
            {
                return user.Password.Equals(password);
            }

            return false;
        }

        public CustomUser FindBySubjectId(string subjectId)
        {
            return _users.FirstOrDefault(x => x.SubjectId == subjectId);
        }

        public CustomUser FindByUsername(string username)
        {
            return _users.FirstOrDefault(x => x.UserName.Equals(username, StringComparison.OrdinalIgnoreCase));
        }
    }
}

The CustomProfileService uses the IUserRepository to get the user data, and adds the claims for the user to the tokens, which are returned to the client, if the user/application was validated.

using System.Security.Claims;
using System.Threading.Tasks;
using IdentityServer4.Extensions;
using IdentityServer4.Models;
using IdentityServer4.Services;
using Microsoft.Extensions.Logging;
using System.Collections.Generic;

namespace CustomIdentityServer4.UserServices
{
    public class CustomProfileService : IProfileService
    {
        protected readonly ILogger Logger;


        protected readonly IUserRepository _userRepository;

        public CustomProfileService(IUserRepository userRepository, ILogger<CustomProfileService> logger)
        {
            _userRepository = userRepository;
            Logger = logger;
        }


        public async Task GetProfileDataAsync(ProfileDataRequestContext context)
        {
            var sub = context.Subject.GetSubjectId();

            Logger.LogDebug("Get profile called for subject {subject} from client {client} with claim types {claimTypes} via {caller}",
                context.Subject.GetSubjectId(),
                context.Client.ClientName ?? context.Client.ClientId,
                context.RequestedClaimTypes,
                context.Caller);

            var user = _userRepository.FindBySubjectId(context.Subject.GetSubjectId());

            var claims = new List<Claim>
            {
                new Claim("role", "dataEventRecords.admin"),
                new Claim("role", "dataEventRecords.user"),
                new Claim("username", user.UserName),
                new Claim("email", user.Email)
            };

            context.IssuedClaims = claims;
        }

        public async Task IsActiveAsync(IsActiveContext context)
        {
            var sub = context.Subject.GetSubjectId();
            var user = _userRepository.FindBySubjectId(context.Subject.GetSubjectId());
            context.IsActive = user != null;
        }
    }
}

The CustomResourceOwnerPasswordValidator implements the validation.

using IdentityServer4.Validation;
using IdentityModel;
using System.Threading.Tasks;

namespace CustomIdentityServer4.UserServices
{
    public class CustomResourceOwnerPasswordValidator : IResourceOwnerPasswordValidator
    {
        private readonly IUserRepository _userRepository;

        public CustomResourceOwnerPasswordValidator(IUserRepository userRepository)
        {
            _userRepository = userRepository;
        }

        public Task ValidateAsync(ResourceOwnerPasswordValidationContext context)
        {
            if (_userRepository.ValidateCredentials(context.UserName, context.Password))
            {
                var user = _userRepository.FindByUsername(context.UserName);
                context.Result = new GrantValidationResult(user.SubjectId, OidcConstants.AuthenticationMethods.Password);
            }

            return Task.FromResult(0);
        }
    }
}

The AccountController is configured to use the IUserRepository interface.

   public class AccountController : Controller
    {
        private readonly IIdentityServerInteractionService _interaction;
        private readonly AccountService _account;
        private readonly IUserRepository _userRepository;

        public AccountController(
            IIdentityServerInteractionService interaction,
            IClientStore clientStore,
            IHttpContextAccessor httpContextAccessor,
            IUserRepository userRepository)
        {
            _interaction = interaction;
            _account = new AccountService(interaction, httpContextAccessor, clientStore);
            _userRepository = userRepository;
        }

        /// <summary>
        /// Show login page
        /// </summary>
        [HttpGet]

Setting up a grant type ResourceOwnerPasswordAndClientCredentials to use refresh tokens

The grant type ResourceOwnerPasswordAndClientCredentials is configured in the GetClients method in the IdentityServer4 application. To use refresh tokens, you must add the IdentityServerConstants.StandardScopes.OfflineAccess to the allowed scopes. Then the other refresh token settings can be set as required.

public static IEnumerable<Client> GetClients()
{
	return new List<Client>
	{
		new Client
		{
			ClientId = "resourceownerclient",

			AllowedGrantTypes = GrantTypes.ResourceOwnerPasswordAndClientCredentials,
			AccessTokenType = AccessTokenType.Jwt,
			AccessTokenLifetime = 120, //86400,
			IdentityTokenLifetime = 120, //86400,
			UpdateAccessTokenClaimsOnRefresh = true,
			SlidingRefreshTokenLifetime = 30,
			AllowOfflineAccess = true,
			RefreshTokenExpiration = TokenExpiration.Absolute,
			RefreshTokenUsage = TokenUsage.OneTimeOnly,
			AlwaysSendClientClaims = true,
			Enabled = true,
			ClientSecrets=  new List<Secret> { new Secret("dataEventRecordsSecret".Sha256()) },
			AllowedScopes = {
				IdentityServerConstants.StandardScopes.OpenId,
				IdentityServerConstants.StandardScopes.Profile,
				IdentityServerConstants.StandardScopes.Email,
				IdentityServerConstants.StandardScopes.OfflineAccess,
				"dataEventRecords"
			}
		}
	};
}

When the token client requests a token, the offline_access must be sent in the HTTP request, to recieve a refresh token.

private static async Task<TokenResponse> RequestTokenAsync(string user, string password)
{
	return await _tokenClient.RequestResourceOwnerPasswordAsync(
		user,
		password,
		"email openid dataEventRecords offline_access");
}

Running the application

When all three applications are started, the console application gets the tokens from the IdentityServer4 application and the required claims are returned to the console application in the token. Not all the claims need to be added to the access_token, only the ones which are required on the resource server. If the user info is required in the UI, a separate request can be made for this info.

Here’s the token payload returned from the server to the client in the token. You can see the extra data added in the profile service, for example the role array.

{
  "nbf": 1492161131,
  "exp": 1492161251,
  "iss": "https://localhost:44318",
  "aud": [
    "https://localhost:44318/resources",
    "dataEventRecords"
  ],
  "client_id": "resourceownerclient",
  "sub": "123",
  "auth_time": 1492161130,
  "idp": "local",
  "role": [
    "dataEventRecords.admin",
    "dataEventRecords.user"
  ],
  "username": "damienbod",
  "email": "damienbod@email.ch",
  "scope": [
    "email",
    "openid",
    "dataEventRecords",
    "offline_access"
  ],
  "amr": [
    "pwd"
  ]
}

The token is used to get the data from the resource server. The client uses the access_token and adds it to the header of the HTTP request.

HttpClient httpClient = new HttpClient();
httpClient.SetBearerToken(access_token);

var payloadFromResourceServer = await httpClient.GetAsync("https://localhost:44365/api/DataEventRecords");
if (!payloadFromResourceServer.IsSuccessStatusCode)
{
	Console.WriteLine(payloadFromResourceServer.StatusCode);
}
else
{
	var content = await payloadFromResourceServer.Content.ReadAsStringAsync();
	Console.WriteLine(JArray.Parse(content));
}

The resource server validates each request using the UseIdentityServerAuthentication middleware extension method.

JwtSecurityTokenHandler.DefaultInboundClaimTypeMap.Clear();
IdentityServerAuthenticationOptions identityServerValidationOptions = new IdentityServerAuthenticationOptions
{
	Authority = "https://localhost:44318/",
	AllowedScopes = new List<string> { "dataEventRecords" },
	ApiSecret = "dataEventRecordsSecret",
	ApiName = "dataEventRecords",
	AutomaticAuthenticate = true,
	SupportedTokens = SupportedTokens.Both,
	// TokenRetriever = _tokenRetriever,
	// required if you want to return a 403 and not a 401 for forbidden responses
	AutomaticChallenge = true,
};

app.UseIdentityServerAuthentication(identityServerValidationOptions);

Each API is protected using the Authorize attribute with policies if needed. The HttpContext can be used to get the claims sent with the token, if required. The username is sent with the access_token in the header.

[Authorize("dataEventRecordsUser")]
[HttpGet]
public IActionResult Get()
{
	var userName = HttpContext.User.FindFirst("username")?.Value;
	return Ok(_dataEventRecordRepository.GetAll());
}

The client gets a refresh token and updates periodically in the client. You could use a background task to implement this in a desktop or mobile application.

public static async Task RunRefreshAsync(TokenResponse response, int milliseconds)
{
	var refresh_token = response.RefreshToken;

	while (true)
	{
		response = await RefreshTokenAsync(refresh_token);

		// Get the resource data using the new tokens...
		await ResourceDataClient.GetDataAndDisplayInConsoleAsync(response.AccessToken);

		if (response.RefreshToken != refresh_token)
		{
			ShowResponse(response);
			refresh_token = response.RefreshToken;
		}

		Task.Delay(milliseconds).Wait();
	}
}

The application then loops forever.

Links:

https://github.com/damienbod/AspNet5IdentityServerAngularImplicitFlow

https://github.com/IdentityModel/IdentityModel2

https://github.com/IdentityServer/IdentityServer4

https://github.com/IdentityServer/IdentityServer4.Samples


Using Angular in an ASP.NET Core View with Webpack

$
0
0

This article shows how Angular can be run inside an ASP.NET Core MVC view using Webpack to build the Angular application. By using Webpack, the Angular application can be built using the AOT and Angular lazy loading features and also profit from the advantages of using a server side rendered view. If you prefer to separate the SPA and the server into 2 applications, use Angular CLI or a similiar template.

Code: https://github.com/damienbod/AspNetCoreMvcAngular

Blogs in this Series

The application was created using the .NET Core ASP.NET Core application template in Visual Studio 2017. A packages.json npm file was added to the project. The file contains the frontend build scripts as well as the npm packages required to build the application using Webpack and also the Angular packages.

{
  "name": "angular-webpack-visualstudio",
  "version": "1.0.0",
  "description": "An Angular VS template",
  "author": "",
  "license": "ISC",
    "repository": {
    "type": "git",
    "url": "https://github.com/damienbod/Angular2WebpackVisualStudio.git"
  },
  "scripts": {
    "ngc": "ngc -p ./tsconfig-aot.json",
    "webpack-dev": "set NODE_ENV=development && webpack",
    "webpack-production": "set NODE_ENV=production && webpack",
    "build-dev": "npm run webpack-dev",
    "build-production": "npm run ngc && npm run webpack-production",
    "watch-webpack-dev": "set NODE_ENV=development && webpack --watch --color",
    "watch-webpack-production": "npm run build-production --watch --color",
    "publish-for-iis": "npm run build-production && dotnet publish -c Release",
    "test": "karma start"
  },
  "dependencies": {
    "@angular/common": "4.1.0",
    "@angular/compiler": "4.1.0",
    "@angular/compiler-cli": "4.1.0",
    "@angular/platform-server": "4.1.0",
    "@angular/core": "4.1.0",
    "@angular/forms": "4.1.0",
    "@angular/http": "4.1.0",
    "@angular/platform-browser": "4.1.0",
    "@angular/platform-browser-dynamic": "4.1.0",
    "@angular/router": "4.1.0",
    "@angular/upgrade": "4.1.0",
    "@angular/animations": "4.1.0",
    "angular-in-memory-web-api": "0.3.1",
    "core-js": "2.4.1",
    "reflect-metadata": "0.1.10",
    "rxjs": "5.3.0",
    "zone.js": "0.8.8",
    "bootstrap": "^3.3.7",
    "ie-shim": "~0.1.0"
  },
  "devDependencies": {
    "@types/node": "7.0.13",
    "@types/jasmine": "2.5.47",
    "angular2-template-loader": "0.6.2",
    "angular-router-loader": "^0.6.0",
    "awesome-typescript-loader": "3.1.2",
    "clean-webpack-plugin": "^0.1.16",
    "concurrently": "^3.4.0",
    "copy-webpack-plugin": "^4.0.1",
    "css-loader": "^0.28.0",
    "file-loader": "^0.11.1",
    "html-webpack-plugin": "^2.28.0",
    "jquery": "^3.2.1",
    "json-loader": "^0.5.4",
    "node-sass": "^4.5.2",
    "raw-loader": "^0.5.1",
    "rimraf": "^2.6.1",
    "sass-loader": "^6.0.3",
    "source-map-loader": "^0.2.1",
    "style-loader": "^0.16.1",
    "ts-helpers": "^1.1.2",
    "tslint": "^5.1.0",
    "tslint-loader": "^3.5.2",
    "typescript": "2.3.2",
    "url-loader": "^0.5.8",
    "webpack": "^2.4.1",
    "webpack-dev-server": "2.4.2",
    "jasmine-core": "2.5.2",
    "karma": "1.6.0",
    "karma-chrome-launcher": "2.0.0",
    "karma-jasmine": "1.1.0",
    "karma-sourcemap-loader": "0.3.7",
    "karma-spec-reporter": "0.0.31",
    "karma-webpack": "2.0.3"
  },
  "-vs-binding": {
    "ProjectOpened": [
      "watch-webpack-dev"
    ]
  }
}

The angular application is added to the angularApp folder. This frontend app implements a default module and also a second about module which is lazy loaded when required (About button clicked). See Angular Lazy Loading with Webpack 2 for further details.

The _Layout.cshtml MVC View is also added here as a template. This will be used to build into the MVC application in the Views folder.

The webpack.prod.js uses all the Angular project files and builds them into pre-compiled AOT bundles, and also a separate bundle for the about module which is lazy loaded. Webpack adds the built bundles to the _Layout.cshtml template and copies this to the Views/Shared/_Layout.cshtml file.

var path = require('path');

var webpack = require('webpack');

var HtmlWebpackPlugin = require('html-webpack-plugin');
var CopyWebpackPlugin = require('copy-webpack-plugin');
var CleanWebpackPlugin = require('clean-webpack-plugin');
var helpers = require('./webpack.helpers');

console.log('@@@@@@@@@ USING PRODUCTION @@@@@@@@@@@@@@@');

module.exports = {

    entry: {
        'vendor': './angularApp/vendor.ts',
        'polyfills': './angularApp/polyfills.ts',
        'app': './angularApp/main-aot.ts' // AoT compilation
    },

    output: {
        path: __dirname + '/wwwroot/',
        filename: 'dist/[name].[hash].bundle.js',
        chunkFilename: 'dist/[id].[hash].chunk.js',
        publicPath: ''
    },

    resolve: {
        extensions: ['.ts', '.js', '.json', '.css', '.scss', '.html']
    },

    devServer: {
        historyApiFallback: true,
        stats: 'minimal',
        outputPath: path.join(__dirname, 'wwwroot/')
    },

    module: {
        rules: [
            {
                test: /\.ts$/,
                loaders: [
                    'awesome-typescript-loader',
                    'angular-router-loader?aot=true&genDir=aot/'
                ]
            },
            {
                test: /\.(png|jpg|gif|woff|woff2|ttf|svg|eot)$/,
                loader: 'file-loader?name=assets/[name]-[hash:6].[ext]'
            },
            {
                test: /favicon.ico$/,
                loader: 'file-loader?name=/[name].[ext]'
            },
            {
                test: /\.css$/,
                loader: 'style-loader!css-loader'
            },
            {
                test: /\.scss$/,
                exclude: /node_modules/,
                loaders: ['style-loader', 'css-loader', 'sass-loader']
            },
            {
                test: /\.html$/,
                loader: 'raw-loader'
            }
        ],
        exprContextCritical: false
    },

    plugins: [
        new CleanWebpackPlugin(
            [
                './wwwroot/dist',
                './wwwroot/assets'
            ]
        ),
        new webpack.NoEmitOnErrorsPlugin(),
        new webpack.optimize.UglifyJsPlugin({
            compress: {
                warnings: false
            },
            output: {
                comments: false
            },
            sourceMap: false
        }),
        new webpack.optimize.CommonsChunkPlugin(
            {
                name: ['vendor', 'polyfills']
            }),

        new HtmlWebpackPlugin({
            filename: '../Views/Shared/_Layout.cshtml',
            inject: 'body',
            template: 'angularApp/_Layout.cshtml'
        }),

        new CopyWebpackPlugin([
            { from: './angularApp/images/*.*', to: 'assets/', flatten: true }
        ])
    ]
};

The Startup.cs is configured to load the configuration and middlerware for the application using client or server routing as required.

using System;
using System.Collections.Generic;
using System.Linq;
using System.Threading.Tasks;
using Microsoft.AspNetCore.Builder;
using Microsoft.AspNetCore.Hosting;
using Microsoft.Extensions.Configuration;
using Microsoft.Extensions.DependencyInjection;
using Microsoft.Extensions.Logging;
using AspNetCoreMvcAngular.Repositories.Things;
using Microsoft.AspNetCore.Http;

namespace AspNetCoreMvcAngular
{
    public class Startup
    {
        public Startup(IHostingEnvironment env)
        {
            var builder = new ConfigurationBuilder()
                .SetBasePath(env.ContentRootPath)
                .AddJsonFile("appsettings.json", optional: false, reloadOnChange: true)
                .AddJsonFile($"appsettings.{env.EnvironmentName}.json", optional: true)
                .AddEnvironmentVariables();
            Configuration = builder.Build();
        }

        public IConfigurationRoot Configuration { get; }

        public void ConfigureServices(IServiceCollection services)
        {
            services.AddCors(options =>
            {
                options.AddPolicy("AllowAllOrigins",
                    builder =>
                    {
                        builder
                            .AllowAnyOrigin()
                            .AllowAnyHeader()
                            .AllowAnyMethod();
                    });
            });

            services.AddSingleton<IThingsRepository, ThingsRepository>();

            services.AddMvc();
        }

        public void Configure(IApplicationBuilder app, IHostingEnvironment env, ILoggerFactory loggerFactory)
        {
            loggerFactory.AddConsole(Configuration.GetSection("Logging"));
            loggerFactory.AddDebug();

            var angularRoutes = new[] {
                 "/default",
                 "/about"
             };

            app.Use(async (context, next) =>
            {
                if (context.Request.Path.HasValue && null != angularRoutes.FirstOrDefault(
                    (ar) => context.Request.Path.Value.StartsWith(ar, StringComparison.OrdinalIgnoreCase)))
                {
                    context.Request.Path = new PathString("/");
                }

                await next();
            });

            app.UseCors("AllowAllOrigins");

            app.UseDefaultFiles();
            app.UseStaticFiles();

            if (env.IsDevelopment())
            {
                app.UseDeveloperExceptionPage();
                app.UseBrowserLink();
            }
            else
            {
                app.UseExceptionHandler("/Home/Error");
            }

            app.UseStaticFiles();

            app.UseMvc(routes =>
            {
                routes.MapRoute(
                    name: "default",
                    template: "{controller=Home}/{action=Index}/{id?}");
            });
        }
    }
}

The application can be built and run using the command line. The client application needs to be built before you can deploy or run!

> npm install
> npm run build-production
> dotnet restore
> dotnet run

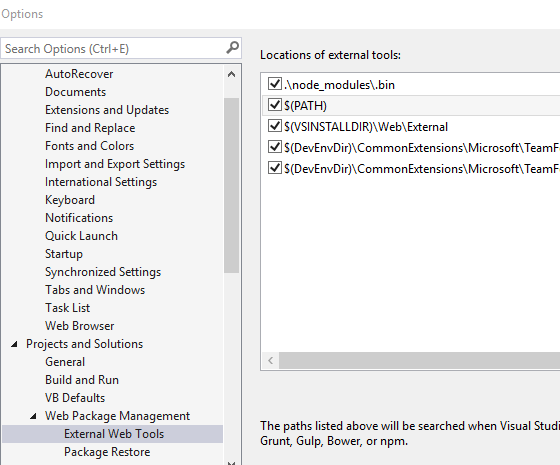
You can also build inside Visual Studio 2017 using the Task Runner Explorer. If building inside Visual Studio 2017, you need to configure the NodeJS path correctly to use the right version.

Now you have to best of both worlds in the UI.

Note:
You could also use Microsoft ASP.NET Core JavaScript Services which supports server side pre rendering but not client side lazy loading. If your using Microsoft ASP.NET Core JavaScript Services, configure the application to use AOT builds for the Angulat template.

Links:

Angular Templates, Seeds, Starter Kits

https://github.com/damienbod/AngularWebpackVisualStudio

https://damienbod.com/2016/06/12/asp-net-core-angular2-with-webpack-and-visual-studio/

https://github.com/aspnet/JavaScriptServices


Secure ASP.NET Core MVC with Angular using IdentityServer4 OpenID Connect Hybrid Flow

$
0
0

This article shows how an ASP.NET Core MVC application using Angular in the razor views can be secured using IdentityServer4 and the OpenID Connect Hybrid Flow. The user interface uses server side rendering for the MVC views and the Angular app is then implemented in the razor view. The required security features can be added to the application easily using ASP.NET Core, which makes it safe to use the OpenID Connect Hybrid flow, which once authenticated and authorised, saves the token in a secure cookie. This is not an SPA application, it is an ASP.NET Core MVC application with Angular in the razor view. If you are implementing an SPA application, you should use the OpenID Connect Implicit Flow.

Code: https://github.com/damienbod/AspNetCoreMvcAngular

Blogs in this Series

IdentityServer4 configuration for OpenID Connect Hybrid Flow

IdentityServer4 is implemented using ASP.NET Core Identity with SQLite. The application implements the OpenID Connect Hybrid flow. The client is configured to allow the required scopes, for example the ‘openid’ scope must be added and also the RedirectUris property which implements the URL which is implemented on the client using the ASP.NET Core OpenID middleware.

using IdentityServer4;
using IdentityServer4.Models;
using System.Collections.Generic;

namespace QuickstartIdentityServer
{
    public class Config
    {
        public static IEnumerable<IdentityResource> GetIdentityResources()
        {
            return new List<IdentityResource>
            {
                new IdentityResources.OpenId(),
                new IdentityResources.Profile(),
                new IdentityResources.Email(),
                new IdentityResource("thingsscope",new []{ "role", "admin", "user", "thingsapi" } )
            };
        }

        public static IEnumerable<ApiResource> GetApiResources()
        {
            return new List<ApiResource>
            {
                new ApiResource("thingsscope")
                {
                    ApiSecrets =
                    {
                        new Secret("thingsscopeSecret".Sha256())
                    },
                    Scopes =
                    {
                        new Scope
                        {
                            Name = "thingsscope",
                            DisplayName = "Scope for the thingsscope ApiResource"
                        }
                    },
                    UserClaims = { "role", "admin", "user", "thingsapi" }
                }
            };
        }

        // clients want to access resources (aka scopes)
        public static IEnumerable<Client> GetClients()
        {
            // client credentials client
            return new List<Client>
            {
                new Client
                {
                    ClientName = "angularmvcmixedclient",
                    ClientId = "angularmvcmixedclient",
                    ClientSecrets = {new Secret("thingsscopeSecret".Sha256()) },
                    AllowedGrantTypes = GrantTypes.Hybrid,
                    AllowOfflineAccess = true,
                    RedirectUris = { "https://localhost:44341/signin-oidc" },
                    PostLogoutRedirectUris = { "https://localhost:44341/signout-callback-oidc" },
                    AllowedCorsOrigins = new List<string>
                    {
                        "https://localhost:44341/"
                    },
                    AllowedScopes = new List<string>
                    {
                        IdentityServerConstants.StandardScopes.OpenId,
                        IdentityServerConstants.StandardScopes.Profile,
                        IdentityServerConstants.StandardScopes.OfflineAccess,
                        "thingsscope",
                        "role"

                    }
                }
            };
        }
    }
}

MVC Angular Client Configuration

The ASP.NET Core MVC application with Angular is implemented as shown in this post: Using Angular in an ASP.NET Core View with Webpack

The cookie authentication middleware is used to store the access token in a cookie, once authorised and authenticated. The OpenIdConnectAuthentication middleware is used to redirect the user to the STS server, if the user is not authenticated. The SaveTokens property is set, so that the token is persisted in the secure cookie.

app.UseCookieAuthentication(new CookieAuthenticationOptions
{
	AuthenticationScheme = "Cookies"
});

app.UseOpenIdConnectAuthentication(new OpenIdConnectOptions
{
	AuthenticationScheme = "oidc",
	SignInScheme = "Cookies",

	Authority = "https://localhost:44348",
	RequireHttpsMetadata = true,

	ClientId = "angularmvcmixedclient",
	ClientSecret = "thingsscopeSecret",

	ResponseType = "code id_token",
	Scope = { "openid", "profile", "thingsscope" },

	GetClaimsFromUserInfoEndpoint = true,
	SaveTokens = true
});

The Authorize attribute is used to secure the MVC controller or API.

using Microsoft.AspNetCore.Mvc;
using Microsoft.AspNetCore.Authorization;

namespace AspNetCoreMvcAngular.Controllers
{
    [Authorize]
    public class HomeController : Microsoft.AspNetCore.Mvc.Controller
    {
        public IActionResult Index()
        {
            return View();
        }

        public IActionResult Error()
        {
            return View();
        }
    }
}

CSP: Content Security Policy in the HTTP Headers

Content Security Policy helps you reduce XSS risks. The really brilliant NWebSec middleware can be used to implement this as required. Thanks to André N. Klingsheim for this excellent library. The middleware adds the headers to the HTTP responses.

https://developer.mozilla.org/en-US/docs/Web/HTTP/CSP

In this configuration, mixed content is not allowed and unsafe inline styles are allowed.

app.UseCsp(opts => opts
	.BlockAllMixedContent()
	.ScriptSources(s => s.Self()).ScriptSources(s => s.UnsafeEval())
	.StyleSources(s => s.UnsafeInline())
);

Set the Referrer-Policy in the HTTP Header

This allows us to restrict the amount of information being passed on to other sites when referring to other sites.

https://developer.mozilla.org/en-US/docs/Web/HTTP/Headers/Referrer-Policy

Scott Helme write a really good post on this:
https://scotthelme.co.uk/a-new-security-header-referrer-policy/

Again NWebSec middleware is used to implement this.

app.UseReferrerPolicy(opts => opts.NoReferrer());

Redirect Validation

You can secure that application so that only redirects to your sites are allowed. For example, only a redirect to IdentityServer4 is allowed.

// Register this earlier if there's middleware that might redirect.
// The IdentityServer4 port needs to be added here.
// If the IdentityServer4 runs on a different server, this configuration needs to be changed.
app.UseRedirectValidation(t => t.AllowSameHostRedirectsToHttps(44348));

Secure Cookies

Only secure cookies should be used to store the session information.

You can check this in the Chrome browser:

XFO: X-Frame-Options

The X-Frame-Options Headers can be used to prevent an IFrame from being used from within the UI. This helps protect against click jacking.

https://developer.mozilla.org/de/docs/Web/HTTP/Headers/X-Frame-Options

app.UseXfo(xfo => xfo.Deny());

Configuring HSTS: Http Strict Transport Security

The HTTP Header tells the browser to force HTTPS for a length of time.

app.UseHsts(hsts => hsts.MaxAge(365).IncludeSubdomains());

TOFU (Trust on first use) or first time loading.

Once you have a proper cert and a fixed URL, you can configure that the browser to preload HSTS settings for your website.

https://hstspreload.org/

https://www.owasp.org/index.php/HTTP_Strict_Transport_Security_Cheat_Sheet

X-Xss-Protection NWebSec

Adds a middleware to the ASP.NET Core pipeline that sets the X-Xss-Protection (Docs from NWebSec)

 app.UseXXssProtection(options => options.EnabledWithBlockMode());

CORS

Only the allowed CORS should be enabled when implementing this. Disabled this as much as possible.

Cross Site Request Forgery XSRF

See this blog:
Anti-Forgery Validation with ASP.NET Core MVC and Angular

Validating the security Headers

Once you start the application, you can check that all the security headers are added as required:

Here’s the Configure method with all the NWebsec app settings as well as the authentication middleware for the client MVC application.

public void Configure(IApplicationBuilder app, IHostingEnvironment env, ILoggerFactory loggerFactory, IAntiforgery antiforgery)
{
	loggerFactory.AddConsole(Configuration.GetSection("Logging"));
	loggerFactory.AddDebug();
	loggerFactory.AddSerilog();

	//Registered before static files to always set header
	app.UseHsts(hsts => hsts.MaxAge(365).IncludeSubdomains());
	app.UseXContentTypeOptions();
	app.UseReferrerPolicy(opts => opts.NoReferrer());

	app.UseCsp(opts => opts
		.BlockAllMixedContent()
		.ScriptSources(s => s.Self()).ScriptSources(s => s.UnsafeEval())
		.StyleSources(s => s.UnsafeInline())
	);

	JwtSecurityTokenHandler.DefaultInboundClaimTypeMap.Clear();

	if (env.IsDevelopment())
	{
		app.UseDeveloperExceptionPage();
	}
	else
	{
		app.UseExceptionHandler("/Home/Error");
	}

	app.UseCookieAuthentication(new CookieAuthenticationOptions
	{
		AuthenticationScheme = "Cookies"
	});

	app.UseOpenIdConnectAuthentication(new OpenIdConnectOptions
	{
		AuthenticationScheme = "oidc",
		SignInScheme = "Cookies",

		Authority = "https://localhost:44348",
		RequireHttpsMetadata = true,

		ClientId = "angularmvcmixedclient",
		ClientSecret = "thingsscopeSecret",

		ResponseType = "code id_token",
		Scope = { "openid", "profile", "thingsscope" },

		GetClaimsFromUserInfoEndpoint = true,
		SaveTokens = true
	});

	var angularRoutes = new[] {
		 "/default",
		 "/about"
	 };

	app.Use(async (context, next) =>
	{
		string path = context.Request.Path.Value;
		if (path != null && !path.ToLower().Contains("/api"))
		{
			// XSRF-TOKEN used by angular in the $http if provided
			  var tokens = antiforgery.GetAndStoreTokens(context);
			context.Response.Cookies.Append("XSRF-TOKEN", tokens.RequestToken, new CookieOptions { HttpOnly = false, Secure = true });
		}

		if (context.Request.Path.HasValue && null != angularRoutes.FirstOrDefault(
			(ar) => context.Request.Path.Value.StartsWith(ar, StringComparison.OrdinalIgnoreCase)))
		{
			context.Request.Path = new PathString("/");
		}

		await next();
	});

	app.UseDefaultFiles();
	app.UseStaticFiles();

	if (env.IsDevelopment())
	{
		app.UseDeveloperExceptionPage();
	}
	else
	{
		app.UseExceptionHandler("/Home/Error");
	}

	app.UseStaticFiles();

	//Registered after static files, to set headers for dynamic content.
	app.UseXfo(xfo => xfo.Deny());

	// Register this earlier if there's middleware that might redirect.
	// The IdentityServer4 port needs to be added here.
	// If the IdentityServer4 runs on a different server, this configuration needs to be changed.
	app.UseRedirectValidation(t => t.AllowSameHostRedirectsToHttps(44348));

	app.UseXXssProtection(options => options.EnabledWithBlockMode());

	app.UseMvc(routes =>
	{
		routes.MapRoute(
			name: "default",
			template: "{controller=Home}/{action=Index}/{id?}");
	});
}

Links:

https://www.scottbrady91.com/OpenID-Connect/OpenID-Connect-Flows

https://docs.nwebsec.com/en/latest/index.html

https://www.nwebsec.com/

https://github.com/NWebsec/NWebsec

https://content-security-policy.com/

https://developer.mozilla.org/en-US/docs/Web/HTTP/CSP

https://developer.mozilla.org/en-US/docs/Web/HTTP/Headers/Referrer-Policy

https://scotthelme.co.uk/a-new-security-header-referrer-policy/

https://developer.mozilla.org/de/docs/Web/HTTP/Headers/X-Frame-Options

https://www.owasp.org/index.php/HTTP_Strict_Transport_Security_Cheat_Sheet

https://gun.io/blog/tofu-web-security/

https://en.wikipedia.org/wiki/Trust_on_first_use

http://www.dotnetnoob.com/2013/07/ramping-up-aspnet-session-security.html

http://openid.net/specs/openid-connect-core-1_0.html

https://www.ssllabs.com/


Anti-Forgery Validation with ASP.NET Core MVC and Angular

$
0
0

This article shows how API requests from an Angular SPA inside an ASP.NET Core MVC application can be protected against XSRF by adding an anti-forgery cookie. This is required, if using Angular, when using cookies to persist the auth token.

Code: https://github.com/damienbod/AspNetCoreMvcAngular

Blogs in this Series

Cross Site Request Forgery

XSRF is an attack where a hacker makes malicious requests to a web app, when the user of the website is already authenticated. This can happen when a website uses cookies to persist the token of an trusted website, user. A pure SPA should not use cookies to as it is hard to protect against this. With a server side rendered application, like ASP.NET Core MVC, anti-forgery cookies can be used to protect against this, which makes it safer, when using cookies.

Angular automatically adds the X-XSRF-TOKEN HTTP Header with the anti-forgery cookie value for each request if the XSRF-TOKEN cookie is present. ASP.NET Core needs to know, that it must use this to validate the request. This can be added to the ConfigureServices method in the Startup class.

public void ConfigureServices(IServiceCollection services)
{
	...
	services.AddAntiforgery(options => options.HeaderName = "X-XSRF-TOKEN");
	services.AddMvc();
}

The XSRF-TOKEN cookie is added to the response of the HTTP request. The cookie is a secure cookie so this is only sent with HTTPS and not HTTP. All HTTP (Not HTTPS) requests will fail and return a 400 response. The cookie is created and added each time a new server url is called, but not for an API call.

app.Use(async (context, next) =>
{
	string path = context.Request.Path.Value;
	if (path != null && !path.ToLower().Contains("/api"))
	{
		// XSRF-TOKEN used by angular in the $http if provided
		var tokens = antiforgery.GetAndStoreTokens(context);
		context.Response.Cookies.Append("XSRF-TOKEN",
		  tokens.RequestToken, new CookieOptions {
		    HttpOnly = false,
		    Secure = true
		  }
		);
	}

	...

	await next();
});

The API uses the ValidateAntiForgeryToken attribute to check if the request contains the correct value for the XSRF-TOKEN cookie. If this is incorrect, or not sent, the request is rejected with a 400 response. The attribute is required when data is changed. HTTP GET requests should not require this attribute.

[HttpPut]
[ValidateAntiForgeryToken]
[Route("{id:int}")]
public IActionResult Update(int id, [FromBody]Thing thing)
{
	...

	return Ok(updatedThing);
}

You can check the cookies in the chrome browser.

Or in Firefox using Firebug (Cookies Tab).

Links:

https://docs.microsoft.com/en-us/aspnet/core/security/anti-request-forgery

http://www.fiyazhasan.me/angularjs-anti-forgery-with-asp-net-core/

http://www.dotnetcurry.com/aspnet/1343/aspnet-core-csrf-antiforgery-token

http://stackoverflow.com/questions/43312973/how-to-implement-x-xsrf-token-with-angular2-app-and-net-core-app/43313402

https://en.wikipedia.org/wiki/Cross-site_request_forgery

https://stormpath.com/blog/angular-xsrf


Implementing a silent token renew in Angular for the OpenID Connect Implicit flow

$
0
0

This article shows how to implement a silent token renew in Angular using IdentityServer4 as the security token service server. The SPA Angular client implements the OpenID Connect Implicit Flow ‘id_token token’. When the id_token expires, the client requests new tokens from the server, so that the user does not need to authorise again.

Code: https://github.com/damienbod/AspNet5IdentityServerAngularImplicitFlow

Other posts in this series:

When a user of the client app authorises for the first time, after a successful login on the STS server, the AuthorizedCallback function is called in the Angular application. If the server response and the tokens are successfully validated, as defined in the OpenID Connect specification, the silent renew is initialized, and the token validation method is called.

 public AuthorizedCallback() {

	...

	if (authResponseIsValid) {

		...

		if (this._configuration.silent_renew) {
			this._oidcSecuritySilentRenew.initRenew();
		}

		this.runTokenValidatation();

		this._router.navigate([this._configuration.startupRoute]);
	} else {
		this.ResetAuthorizationData();
		this._router.navigate(['/Unauthorized']);
	}

}

The OidcSecuritySilentRenew Typescript class implements the iframe which is used for the silent token renew. This iframe is added to the parent HTML page. The renew is implemented in an iframe, because we do not want the Angular application to refresh, otherwise for example we would lose form data.

...

@Injectable()
export class OidcSecuritySilentRenew {

    private expiresIn: number;
    private authorizationTime: number;
    private renewInSeconds = 30;

    private _sessionIframe: any;

    constructor(private _configuration: AuthConfiguration) {
    }

    public initRenew() {
        this._sessionIframe = window.document.createElement('iframe');
        console.log(this._sessionIframe);
        this._sessionIframe.style.display = 'none';

        window.document.body.appendChild(this._sessionIframe);
    }

    ...
}

The runTokenValidatation function starts an Observable timer. The application subscribes to the Observable which executes every 3 seconds. The id_token is validated, or more precise, checks that the id_token has not expired. If the token has expired and the silent_renew configuration has been activated, the RefreshSession function will be called, to get new tokens.

private runTokenValidatation() {
	let source = Observable.timer(3000, 3000)
		.timeInterval()
		.pluck('interval')
		.take(10000);

	let subscription = source.subscribe(() => {
		if (this._isAuthorized) {
			if (this.oidcSecurityValidation.IsTokenExpired(this.retrieve('authorizationDataIdToken'))) {
				console.log('IsAuthorized: isTokenExpired');

				if (this._configuration.silent_renew) {
					this.RefreshSession();
				} else {
					this.ResetAuthorizationData();
				}
			}
		}
	},
	function (err: any) {
		console.log('Error: ' + err);
	},
	function () {
		console.log('Completed');
	});
}

The RefreshSession function creates the required nonce and state which is used for the OpenID Implicit Flow validation and starts an authentication and authorization of the client application and the user.

public RefreshSession() {
        console.log('BEGIN refresh session Authorize');

        let nonce = 'N' + Math.random() + '' + Date.now();
        let state = Date.now() + '' + Math.random();

        this.store('authStateControl', state);
        this.store('authNonce', nonce);
        console.log('RefreshSession created. adding myautostate: ' + this.retrieve('authStateControl'));

        let url = this.createAuthorizeUrl(nonce, state);

        this._oidcSecuritySilentRenew.startRenew(url);
    }

The startRenew sets the iframe src to the url for the OpenID Connect flow. If successful, the id_token and the access_token are returned and the application runs without any interupt.

public startRenew(url: string) {
        this._sessionIframe.src = url;

        return new Promise((resolve) => {
            this._sessionIframe.onload = () => {
                resolve();
            }
        });
}

IdentityServer4 Implicit Flow configuration

The STS server, using IdentityServer4 implements the server side of the OpenID Implicit flow. The AccessTokenLifetime and the IdentityTokenLifetime properties are set to 30s and 10s. After 10s the id_token will expire and the client application will request new tokens. The access_token is valid for 30s, so that any client API requests will not fail. If you set these values to the same value, then the client will have to request new tokens before the id_token expires.

new Client
{
	ClientName = "angularclient",
	ClientId = "angularclient",
	AccessTokenType = AccessTokenType.Reference,
	AccessTokenLifetime = 30,
	IdentityTokenLifetime = 10,
	AllowedGrantTypes = GrantTypes.Implicit,
	AllowAccessTokensViaBrowser = true,
	RedirectUris = new List<string>
	{
		"https://localhost:44311"

	},
	PostLogoutRedirectUris = new List<string>
	{
		"https://localhost:44311/Unauthorized"
	},
	AllowedCorsOrigins = new List<string>
	{
		"https://localhost:44311",
		"http://localhost:44311"
	},
	AllowedScopes = new List<string>
	{
		"openid",
		"dataEventRecords",
		"dataeventrecordsscope",
		"securedFiles",
		"securedfilesscope",
		"role"
	}
}

When the application is run, the user can login, and the tokens are refreshed every ten seconds as configured on the server.

Links:

http://openid.net/specs/openid-connect-implicit-1_0.html

https://github.com/IdentityServer/IdentityServer4

https://identityserver4.readthedocs.io/en/release/


OpenID Connect Session Management using an Angular application and IdentityServer4

$
0
0

The article shows how the OpenID Connect Session Management can be implemented in an Angular application. The OpenID Connect Session Management 1.0 provides a way of monitoring the user session on the server using iframes. IdentityServer4 implements the server side of the specification. This does not monitor the lifecycle of the tokens used in the browser application. This session only monitors the server session. This has nothing to do with the OpenID tokens used by the SPA application.

Code: https://github.com/damienbod/AspNet5IdentityServerAngularImplicitFlow

Code: Angular auth module

Other posts in this series:

The OidcSecurityCheckSession class implements the Session Management from the specification. The init function creates an iframe and adds it to the window document in the DOM. The iframe uses the ‘authWellKnownEndpoints.check_session_iframe’ value, which is the connect/checksession API got from the ‘.well-known/openid-configuration’ service.

The init function also adds the event for the message, which is specified in the OpenID Connect Session Management documentation.

init() {
	this.sessionIframe = window.document.createElement('iframe');
	this.oidcSecurityCommon.logDebug(this.sessionIframe);
	this.sessionIframe.style.display = 'none';
	this.sessionIframe.src = this.authWellKnownEndpoints.check_session_iframe;

	window.document.body.appendChild(this.sessionIframe);
	this.iframeMessageEvent = this.messageHandler.bind(this);
	window.addEventListener('message', this.iframeMessageEvent, false);

	return Observable.create((observer: Observer<any>) => {
		this.sessionIframe.onload = () => {
			observer.next(this);
			observer.complete();
		}
	});
}

The pollServerSession function, posts a message every 3 seconds to the iframe which checks if the session on the server has been changed. The session_state is the value returned in the HTTP callback from a successful authorization.

pollServerSession(session_state: any, clientId: any) {
	let source = Observable.timer(3000, 3000)
		.timeInterval()
		.pluck('interval')
		.take(10000);

	let subscription = source.subscribe(() => {
			this.oidcSecurityCommon.logDebug(this.sessionIframe);
			this.sessionIframe.contentWindow.postMessage(clientId + ' ' + session_state, this.authConfiguration.stsServer);
		},
		(err: any) => {
			this.oidcSecurityCommon.logError('pollServerSession error: ' + err);
		},
		() => {
			this.oidcSecurityCommon.logDebug('checksession pollServerSession completed');
		});
}

The messageHandler handles the callback from the iframe. If the server session has changed, the output onCheckSessionChanged event is triggered.

private messageHandler(e: any) {
	if (e.origin === this.authConfiguration.stsServer &&
		e.source === this.sessionIframe.contentWindow
	) {
		if (e.data === 'error') {
			this.oidcSecurityCommon.logWarning('error from checksession messageHandler');
		} else if (e.data === 'changed') {
			this.onCheckSessionChanged.emit();
		} else {
			this.oidcSecurityCommon.logDebug(e.data + ' from checksession messageHandler');
		}
	}
}

The onCheckSessionChanged is a public EventEmitter output for this provider.

@Output() onCheckSessionChanged: EventEmitter<any> = new EventEmitter<any>(true);

The OidcSecurityService provider subscribes to the onCheckSessionChanged event and uses its onCheckSessionChanged function to handle this event.

this.oidcSecurityCheckSession.onCheckSessionChanged.subscribe(() => { this.onCheckSessionChanged(); });

After a successful login, and if the tokens are valid, the client application checks if the checksession should be used, and calls the init method and subscribes to it. When ready, it uses the pollServerSession function to activate the monitoring.

if (this.authConfiguration.start_checksession) {
  this.oidcSecurityCheckSession.init().subscribe(() => {
    this.oidcSecurityCheckSession.pollServerSession(
      result.session_state,
      this.authConfiguration.client_id
    );
  });
}

The onCheckSessionChanged function sets a public boolean which can be used to implement the required application logic when the server sesion has changed.

private onCheckSessionChanged() {
  this.oidcSecurityCommon.logDebug('onCheckSessionChanged');
  this.checkSessionChanged = true;
}

In this demo, the navigation bar allows to Angular application to refresh the session if the server session has changed.

<li>
  <a class="navigationLinkButton" *ngIf="securityService.checkSessionChanged" (click)="refreshSession()">Refresh Session</a>
</li>

When the application is started, the unchanged message is returned.

Then open the server application in a tab in the same browser session, and logout.

And the client application notices tht the server session has changed and can react as required.

Links:

http://openid.net/specs/openid-connect-session-1_0-ID4.html

http://docs.identityserver.io/en/release/


angular-auth-oidc-client Release, an OpenID Implicit Flow client in Angular

$
0
0

I have been blogging and writing code for Angular and OpenID Connect since Nov 1, 2015. Now after all this time, I have decided to create my first npm package for Angular: angular-auth-oidc-client, which makes it easier to use the Angular Auth OpenID client. This is now available on npm.

npm package: https://www.npmjs.com/package/angular-auth-oidc-client

github code: https://github.com/damienbod/angular-auth-oidc-client

issues: https://github.com/damienbod/angular-auth-oidc-client/issues

Using the npm package: see the readme

Samples: https://github.com/damienbod/AspNet5IdentityServerAngularImplicitFlow/tree/npm-lib-test/src/AngularClient

Features:

Notes:

FabianGosebrink and Roberto Simonetti have decided to help and further develop this npm package which I’m very grateful. Anyone wishing to get involved, please do and create some issues and pull-requests. Help is always most welcome.

The next step is to do the OpenID Relying Parties certification.


Angular OIDC OAuth2 client with Google Identity Platform

$
0
0

This article shows how an Angular client could implement a login for a SPA application using Google Identity Platform OpenID. The Angular application uses the npm package angular-auth-oidc-client to implement the OpenID Connect Implicit Flow to connect with the google identity platform.

Code: https://github.com/damienbod/angular-auth-oidc-sample-google-openid

Setting up Google Identity Platform

The Google Identity Platform provides good documentation on how to set up its OpenID Connect implementation.

You need to login into google using a gmail account.
https://accounts.google.com

Now open the OpenID Connect google documentation page

https://developers.google.com/identity/protocols/OpenIDConnect

Open the credentials page provided as a link.

https://console.developers.google.com/apis/credentials

Create new credentials for your application, select OAuth Client ID in the drop down:

Select a web application and configure the parameters to match your client application URLs.

Implementing the Angular OpenID Connect client

The client application is implemtented using ASP.NET Core and Angular.

The npm package angular-auth-oidc-client is used to connect to the OpenID server. The package can be added to the package.json file in the dependencies.

"dependencies": {
    ...
    "angular-auth-oidc-client": "0.0.8"
},

Now the AuthModule, OidcSecurityService, AuthConfiguration can be imported. The AuthModule.forRoot() is used and added to the root module imports, the OidcSecurityService is added to the providers and the AuthConfiguration is the configuration class which is used to set up the OpenID Connect Implicit Flow.


import { AuthModule, OidcSecurityService, AuthConfiguration } from 'angular-auth-oidc-client';

@NgModule({
    imports: [
        BrowserModule,
        FormsModule,
        routing,
        HttpModule,
        JsonpModule,
        AuthModule.forRoot(),
    ],
    declarations: [
        AppComponent,
        ForbiddenComponent,
        HomeComponent,
        UnauthorizedComponent
    ],
    providers: [
        OidcSecurityService,
        Configuration
    ],
    bootstrap:    [AppComponent],
})

The AuthConfiguration class is used to configure the module.

stsServer
This is the URL where the STS server is located. We use https://accounts.google.com in this example.

redirect_url
This is the redirect_url which was configured on the google client ID on the server.

client_id
The client_id must match the Client ID for Web application which was configured on the google server.

response_type
This must be ‘id_token token’ or ‘id_token’. If you want to use the user service, or access data using using APIs, you must use the ‘id_token token’ configuration. This is the OpenID Connect Implicit Flow. The possible values are defined in the well known configuration URL from the OpenID Connect server.

scope
Scope which are used by the client. The openid must be defined: ‘openid email profile’

post_logout_redirect_uri
Url after a server logout if using the end session API. This is not supported by google OpenID.

start_checksession
Checks the session using OpenID session management. Not supported by google OpenID

silent_renew
Renews the client tokens, once the token_id expires.

startup_route
Angular route after a successful login.

forbidden_route
HTTP 403

unauthorized_route
HTTP 401

log_console_warning_active
Logs all module warnings to the console.

log_console_debug_active
Logs all module debug messages to the console.


export class AppModule {
    constructor(public authConfiguration: AuthConfiguration) {
        this.authConfiguration.stsServer = 'https://accounts.google.com';
        this.authConfiguration.redirect_url = 'https://localhost:44386';
        // The Client MUST validate that the aud (audience) Claim contains its client_id value registered at the Issuer identified by the iss (issuer) Claim as an audience.
        // The ID Token MUST be rejected if the ID Token does not list the Client as a valid audience, or if it contains additional audiences not trusted by the Client.
        this.authConfiguration.client_id = '188968487735-b1hh7k87nkkh6vv84548sinju2kpr7gn.apps.googleusercontent.com';
        this.authConfiguration.response_type = 'id_token token';
        this.authConfiguration.scope = 'openid email profile';
        this.authConfiguration.post_logout_redirect_uri = 'https://localhost:44386/Unauthorized';
        this.authConfiguration.start_checksession = false;
        this.authConfiguration.silent_renew = true;
        this.authConfiguration.startup_route = '/home';
        // HTTP 403
        this.authConfiguration.forbidden_route = '/Forbidden';
        // HTTP 401
        this.authConfiguration.unauthorized_route = '/Unauthorized';
        this.authConfiguration.log_console_warning_active = true;
        this.authConfiguration.log_console_debug_active = true;
        // id_token C8: The iat Claim can be used to reject tokens that were issued too far away from the current time,
        // limiting the amount of time that nonces need to be stored to prevent attacks.The acceptable range is Client specific.
        this.authConfiguration.max_id_token_iat_offset_allowed_in_seconds = 3;
        this.authConfiguration.override_well_known_configuration = true;
        this.authConfiguration.override_well_known_configuration_url = 'https://localhost:44386/wellknownconfiguration.json';
    }
}

Google OpenID does not support the .well-known/openid-configuration API as defined by OpenID. Google blocks this when using it due to a CORS security restriction, so it can not be used from a browser application. As a workaround, the well known configuration can be configured locally when using angular-auth-oidc-client. The goole OpenID configuration can be downloaded using the following URL:

https://accounts.google.com/.well-known/openid-configuration

The json file can then be downloaded and saved locally on your server and this can then be configured in the authConfiguration class using the override_well_known_configuration_url property.

this.authConfiguration.override_well_known_configuration = true;
this.authConfiguration.override_well_known_configuration_url = 'https://localhost:44386/wellknownconfiguration.json';

The following json is the actual configuration for the google well known configuration. What’s really interesting is that the end session endpoint is not supported, which is strange I think.
It’s also interesting to see that the response_types_supported supports a type which is not supported “token id_token”, this should be “id_token token”.

See: http://openid.net/specs/openid-connect-core-1_0.html

{
  "issuer": "https://accounts.google.com",
  "authorization_endpoint": "https://accounts.google.com/o/oauth2/v2/auth",
  "token_endpoint": "https://www.googleapis.com/oauth2/v4/token",
  "userinfo_endpoint": "https://www.googleapis.com/oauth2/v3/userinfo",
  "revocation_endpoint": "https://accounts.google.com/o/oauth2/revoke",
  "jwks_uri": "https://www.googleapis.com/oauth2/v3/certs",
  "response_types_supported": [
    "code",
    "token",
    "id_token",
    "code token",
    "code id_token",
    "token id_token",
    "code token id_token",
    "none"
  ],
  "subject_types_supported": [
    "public"
  ],
  "id_token_signing_alg_values_supported": [
    "RS256"
  ],
  "scopes_supported": [
    "openid",
    "email",
    "profile"
  ],
  "token_endpoint_auth_methods_supported": [
    "client_secret_post",
    "client_secret_basic"
  ],
  "claims_supported": [
    "aud",
    "email",
    "email_verified",
    "exp",
    "family_name",
    "given_name",
    "iat",
    "iss",
    "locale",
    "name",
    "picture",
    "sub"
  ],
  "code_challenge_methods_supported": [
    "plain",
    "S256"
  ]
}

The AppComponent implements the authorize and the authorizedCallback functions from the OidcSecurityService provider.

import { Component, OnInit } from '@angular/core';
import { Router } from '@angular/router';
import { Configuration } from './app.constants';
import { OidcSecurityService } from 'angular-auth-oidc-client';
import { ForbiddenComponent } from './forbidden/forbidden.component';
import { HomeComponent } from './home/home.component';
import { UnauthorizedComponent } from './unauthorized/unauthorized.component';


import './app.component.css';

@Component({
    selector: 'my-app',
    templateUrl: 'app.component.html'
})

export class AppComponent implements OnInit {

    constructor(public securityService: OidcSecurityService) {
    }

    ngOnInit() {
        if (window.location.hash) {
            this.securityService.authorizedCallback();
        }
    }

    login() {
        console.log('start login');
        this.securityService.authorize();
    }

    refreshSession() {
        console.log('start refreshSession');
        this.securityService.authorize();
    }

    logout() {
        console.log('start logoff');
        this.securityService.logoff();
    }
}

Running the application

Start the application using IIS Express in Visual Studio 2017. This starts with https://localhost:44386 which is configured in the launch settings file. If you use a differnt URL, you need to change this in the client application and also the servers client credentials configuration.

Login then with your gmail.

And you are redirected back to the SPA.

Links:

https://www.npmjs.com/package/angular-auth-oidc-client

https://developers.google.com/identity/protocols/OpenIDConnect


Using Protobuf Media Formatters with ASP.NET Core

$
0
0

Theis article shows how to use Protobuf with an ASP.NET Core MVC application. The API uses the WebApiContrib.Core.Formatter.Protobuf Nuget package to add support for Protobuf. This package uses the protobuf-net Nuget package from Marc Gravell, which makes it really easy to use a really fast serializer, deserializer for your APIs.

Code: https://github.com/damienbod/AspNetCoreWebApiContribProtobufSample

Setting up te ASP.NET Core MVC API

To use Protobuf with ASP.NET Core, the WebApiContrib.Core.Formatter.Protobuf Nuget package can be used in your project. You can add this using the Nuget manager in Visual Studio.

Or you can add it directly in your project file.

<PackageReference Include="WebApiContrib.Core.Formatter.Protobuf" Version="1.0.0" />

Now the formatters can be added in the Startup file.

public void ConfigureServices(IServiceCollection services)
{
	services.AddMvc()
		.AddProtobufFormatters();
}

A model now needs to be defined. The protobuf-net attributes are used to define the model class.

using ProtoBuf;

namespace Model
{
    [ProtoContract]
    public class Table
    {
        [ProtoMember(1)]
        public string Name {get;set;}

        [ProtoMember(2)]
        public string Description { get; set; }


        [ProtoMember(3)]
        public string Dimensions { get; set; }
    }
}

The ASP.NET Core MVC API can then be used with the Table class.

using System;
using System.Collections.Generic;
using System.Linq;
using System.Threading.Tasks;
using Microsoft.AspNetCore.Mvc;
using Model;

namespace AspNetCoreWebApiContribProtobufSample.Controllers
{
    [Route("api/[controller]")]
    public class TablesController : Controller
    {
        // GET api/tables
        [HttpGet]
        public IActionResult Get()
        {
            List<Table> tables = new List<Table>
            {
                new Table{Name= "jim", Dimensions="190x80x90", Description="top of the range from Migro"},
                new Table{Name= "jim large", Dimensions="220x100x90", Description="top of the range from Migro"}
            };

            return Ok(tables);
        }

        // GET api/values/5
        [HttpGet("{id}")]
        public IActionResult Get(int id)
        {
            var table = new Table { Name = "jim", Dimensions = "190x80x90", Description = "top of the range from Migro" };
            return Ok(table);
        }

        // POST api/values
        [HttpPost]
        public IActionResult Post([FromBody]Table value)
        {
            var got = value;
            return Created("api/tables", got);
        }
    }
}

Creating a simple Protobuf HttpClient

A HttpClient using the same Table class with the protobuf-net definitions can be used to access the API and request the data with “application/x-protobuf” header.

static async System.Threading.Tasks.Task<Table[]> CallServerAsync()
{
	var client = new HttpClient();

	var request = new HttpRequestMessage(HttpMethod.Get, "http://localhost:31004/api/tables");
	request.Headers.Accept.Add(new MediaTypeWithQualityHeaderValue("application/x-protobuf"));
	var result = await client.SendAsync(request);
	var tables = ProtoBuf.Serializer.Deserialize<Table[]>(await result.Content.ReadAsStreamAsync());
	return tables;
}

The data is returned in the response using Protobuf seriailzation.

If you want to post some data using Protobuf, you can serialize the data to Protobuf and post it to the server using the HttpClient. This example uses “application/x-protobuf”.

static async System.Threading.Tasks.Task<Table> PostStreamDataToServerAsync()
{
	HttpClient client = new HttpClient();
	client.DefaultRequestHeaders
		  .Accept
		  .Add(new MediaTypeWithQualityHeaderValue("application/x-protobuf"));

	HttpRequestMessage request = new HttpRequestMessage(HttpMethod.Post,
		"http://localhost:31004/api/tables");

	MemoryStream stream = new MemoryStream();
	ProtoBuf.Serializer.Serialize<Table>(stream, new Table
	{
		Name = "jim",
		Dimensions = "190x80x90",
		Description = "top of the range from Migro"
	});

	request.Content = new ByteArrayContent(stream.ToArray());

	// HTTP POST with Protobuf Request Body
	var responseForPost = client.SendAsync(request).Result;

	var resultData = ProtoBuf.Serializer.Deserialize<Table>(await responseForPost.Content.ReadAsStreamAsync());
	return resultData;
}

Links:

https://www.nuget.org/packages/WebApiContrib.Core.Formatter.Protobuf/

https://github.com/mgravell/protobuf-net


Adding an external Microsoft login to IdentityServer4

$
0
0

This article shows how to implement a Microsoft Account as an external provider in an IdentityServer4 project using ASP.NET Core Identity with a SQLite database.

Code https://github.com/damienbod/AspNetCoreID4External

Setting up the App Platform for the Microsoft Account

To setup the app, login using your Microsoft account and open the My Applications link

https://apps.dev.microsoft.com/?mkt=en-gb#/appList

Click the ‘Add an app’ button

Give the application a name and add your email. This app is called ‘microsoft_id4_damienbod’

After you clicked the create button, you need to generate a new password. Save this somewhere for the application configuration. This will be the client secret when configuring the application.

Now Add a new platform. Choose a Web type.

Now add the redirect URL for you application. This will be the https://YOUR_URL/signin-microsoft

Add the permissions as required

Application configuration

Clone the IdentityServer4 samples and use the 6_AspNetIdentity project from the quickstarts.
Add the Microsoft.AspNetCore.Authentication.MicrosoftAccount package using Nuget as well as the ASP.NET Core Identity and EFCore packages required to the IdentityServer4 server project.

The application uses SQLite with Identity. This is configured in the Startup class in the ConfigureServices method.

services.AddDbContext<ApplicationDbContext>(options =>
  options.UseSqlite(Configuration.GetConnectionString("DefaultConnection")));

services.AddIdentity<ApplicationUser, IdentityRole>()
  .AddEntityFrameworkStores<ApplicationDbContext>()
  .AddDefaultTokenProviders();

Now the UseMicrosoftAccountAuthentication extension method can be use to add the Microsoft Account external provider middleware in the Configure method in the Startup class. The SignInScheme is set to “Identity.External” because the application is using ASP.NET Core Identity. The ClientId is the Id from the app ‘microsoft_id4_damienbod’ which was configured on the my applications website. The ClientSecret is the generated password.

app.UseIdentity();
app.UseIdentityServer();

app.UseMicrosoftAccountAuthentication(new MicrosoftAccountOptions
{
	AuthenticationScheme = "Microsoft",
	DisplayName = "Microsoft",
	SignInScheme = "Identity.External",
	ClientId = _clientId,
	ClientSecret = _clientSecret
});

The application can now be tested. An Angular client using OpenID Connect sends a login request to the server. The ClientId and the ClientSecret are saved using user secrets, so that the password is not committed in the src code.

Click the Microsoft button to login.

This redirects the user to the Microsoft Account login for the microsoft_id4_damienbod application.

After a successful login, the user is redirected to the consent page.

Click yes, and the user is redirected back to the IdentityServer4 application. If it’s a new user, a register page will be opened.

Click register and the ID4 consent page is opened.

Then the application opens.

What’s nice about the IdentityServer4 application is that it’s a simple ASP.NET Core application with standard Views and Controllers. This makes it really easy to change the flow, for example, if a user is not allowed to register or whatever.

Links

https://docs.microsoft.com/en-us/azure/app-service-mobile/app-service-mobile-how-to-configure-microsoft-authentication

http://docs.identityserver.io/en/release/topics/signin_external_providers.html


Implementing Two-factor authentication with IdentityServer4 and Twilio

$
0
0

This article shows how to implement two factor authentication using Twilio and IdentityServer4 using Identity. On the Microsoft’s Two-factor authentication with SMS documentation, Twilio and ASPSMS are promoted, but any SMS provider can be used.

Code: https://github.com/damienbod/AspNetCoreID4External

Setting up Twilio

Create an account and login to https://www.twilio.com/

Now create a new phone number and use the Twilio documentation to set up your account to send SMS messages. You need the Account SID, Auth Token and the Phone number which are required in the application.

The phone number can be configured here:
https://www.twilio.com/console/phone-numbers/incoming

Adding the SMS support to IdentityServer4

Add the Twilio Nuget package to the IdentityServer4 project.

<PackageReference Include="Twilio" Version="5.5.2" />

The Twilio settings should be a secret, so these configuration properties are added to the app.settings.json file with dummy values. These can then be used for the deployments.

"TwilioSettings": {
  "Sid": "dummy",
  "Token": "dummy",
  "From": "dummy"
}

A configuration class is then created so that the settings can be added to the DI.

using System;
using System.Collections.Generic;
using System.Linq;
using System.Threading.Tasks;

namespace IdentityServerWithAspNetIdentity.Services
{
    public class TwilioSettings
    {
        public string Sid { get; set; }
        public string Token { get; set; }
        public string From { get; set; }
    }
}

Now the user secrets configuration needs to be setup on your dev PC. Right click the IdentityServer4 project and add the user secrets with the proper values which you can get from your Twilio account.

{
  "MicrosoftClientId": "your_secret..",
  "MircosoftClientSecret":  "your_secret..",
  "TwilioSettings": {
    "Sid": "your_secret..",
    "Token": "your_secret..",
    "From": "your_secret..",
  }
}

The configuration class is then added to the DI in the Startup class ConfigureServices method.

var twilioSettings = Configuration.GetSection("TwilioSettings");
services.Configure<TwilioSettings>(twilioSettings);

Now the TwilioSettings can be added to the AuthMessageSender class which is defined in the MessageServices file, if using the IdentityServer4 samples.

private readonly TwilioSettings _twilioSettings;

public AuthMessageSender(ILogger<AuthMessageSender> logger, IOptions<TwilioSettings> twilioSettings)
{
	_logger = logger;
	_twilioSettings = twilioSettings.Value;
}

This class is also added to the DI in the startup class.

services.AddTransient<ISmsSender, AuthMessageSender>();

Now the TwilioClient can be setup to send the SMS in the SendSmsAsync method.

public Task SendSmsAsync(string number, string message)
{
	// Plug in your SMS service here to send a text message.
	_logger.LogInformation("SMS: {number}, Message: {message}", number, message);
	var sid = _twilioSettings.Sid;
	var token = _twilioSettings.Token;
	var from = _twilioSettings.From;
	TwilioClient.Init(sid, token);
	MessageResource.CreateAsync(new PhoneNumber(number),
		from: new PhoneNumber(from),
		body: message);
	return Task.FromResult(0);
}

The SendCode.cshtml view can now be changed to send the SMS with the style, layout you prefer.

<form asp-controller="Account" asp-action="SendCode" asp-route-returnurl="@Model.ReturnUrl" method="post" class="form-horizontal">
    <input asp-for="RememberMe" type="hidden" />
    <input asp-for="SelectedProvider" type="hidden" value="Phone" />
    <input asp-for="ReturnUrl" type="hidden" value="@Model.ReturnUrl" />
    <div class="row">
        <div class="col-md-8">
            <button type="submit" class="btn btn-default">Send a verification code using SMS</button>
        </div>
    </div>
</form>

In the VerifyCode.cshtml, the ReturnUrl from the model property must be added to the form as a hidden item, otherwise your client will not be redirected back to the calling app.

<form asp-controller="Account" asp-action="VerifyCode" asp-route-returnurl="@ViewData["ReturnUrl"]" method="post" class="form-horizontal">
    <div asp-validation-summary="All" class="text-danger"></div>
    <input asp-for="Provider" type="hidden" />
    <input asp-for="RememberMe" type="hidden" />
    <input asp-for="ReturnUrl" type="hidden" value="@Model.ReturnUrl" />
    <h4>@ViewData["Status"]</h4>
    <hr />
    <div class="form-group">
        <label asp-for="Code" class="col-md-2 control-label"></label>
        <div class="col-md-10">
            <input asp-for="Code" class="form-control" />
            <span asp-validation-for="Code" class="text-danger"></span>
        </div>
    </div>
    <div class="form-group">
        <div class="col-md-offset-2 col-md-10">
            <div class="checkbox">
                <input asp-for="RememberBrowser" />
                <label asp-for="RememberBrowser"></label>
            </div>
        </div>
    </div>
    <div class="form-group">
        <div class="col-md-offset-2 col-md-10">
            <button type="submit" class="btn btn-default">Submit</button>
        </div>
    </div>
</form>

Testing the application

If using an existing client, you need to update the Identity in the database. Each user requires that the TwoFactoredEnabled field is set to true and a mobile phone needs to be set in the phone number field, (Or any phone which can accept SMS)

Now login with this user:

The user is redirected to the send SMS page. Click the send SMS button. This sends a SMS to the phone number defined in the Identity for the user trying to authenticate.

You should recieve an SMS. Enter the code in the verify view. If no SMS was sent, check your Twilio account logs.

After a successful code validation, the user is redirected back to the consent page for the client application. If not redirected, the return url was not set in the model.

Links:

https://docs.microsoft.com/en-us/aspnet/core/security/authentication/2fa

https://www.twilio.com/

http://docs.identityserver.io/en/release/

https://www.twilio.com/use-cases/two-factor-authentication


Angular Configuration using ASP.NET Core settings

$
0
0

This post shows how ASP.NET Core application settings can be used to configure an Angular application. ASP.NET Core provides excellent support for different configuration per environment, and so using this for an Angular application can be very useful. Using CI, one release build can be automatically created with different configurations, instead of different release builds per deployment target.

Code: https://github.com/damienbod/AspNet5IdentityServerAngularImplicitFlow/tree/master/src/AngularClient

ASP.NET Core Hosting application

The ClientAppSettings class is used to load the strongly typed appsettings.json from the json file. The class contains the properties required for OIDC configuration in the SPA and the required API URLs. These properties have different values per deployment, so we do not want to add these in a typescript file, or change with each build.

namespace AngularClient.ViewModel
{
    public class ClientAppSettings
    {
        public string  stsServer { get; set; }
        public string redirect_url { get; set; }
        public string client_id { get; set; }
        public string response_type { get; set; }
        public string scope { get; set; }
        public string post_logout_redirect_uri { get; set; }
        public bool start_checksession { get; set; }
        public bool silent_renew { get; set; }
        public string startup_route { get; set; }
        public string forbidden_route { get; set; }
        public string unauthorized_route { get; set; }
        public bool log_console_warning_active { get; set; }
        public bool log_console_debug_active { get; set; }
        public string max_id_token_iat_offset_allowed_in_seconds { get; set; }
        public string apiServer { get; set; }
        public string apiFileServer { get; set; }
    }
}

The appsettings.json file contains the actual values which will be used for each different environment.

{
  "ClientAppSettings": {
    "stsServer": "https://localhost:44318",
    "redirect_url": "https://localhost:44311",
    "client_id": "angularclient",
    "response_type": "id_token token",
    "scope": "dataEventRecords securedFiles openid profile",
    "post_logout_redirect_uri": "https://localhost:44311",
    "start_checksession": false,
    "silent_renew": false,
    "startup_route": "/dataeventrecords",
    "forbidden_route": "/forbidden",
    "unauthorized_route": "/unauthorized",
    "log_console_warning_active": true,
    "log_console_debug_active": true,
    "max_id_token_iat_offset_allowed_in_seconds": 10,
    "apiServer": "https://localhost:44390/",
    "apiFileServer": "https://localhost:44378/"
  }
}

The ClientAppSettings class is then added to the IoC in the ASP.NET Core Startup class and the ClientAppSettings section is used to fill the instance with data.

public void ConfigureServices(IServiceCollection services)
{
  services.Configure<ClientAppSettings>(Configuration.GetSection("ClientAppSettings"));
  services.AddMvc();

A MVC Controller is used to make the settings public. This class gets the strongly typed settings from the IoC and returns it in a HTTP GET request. No application secrets should be included in this HTTP GET request!

using AngularClient.ViewModel;
using Microsoft.AspNetCore.Mvc;
using Microsoft.Extensions.Options;

namespace AngularClient.Controllers
{
    [Route("api/[controller]")]
    public class ClientAppSettingsController : Controller
    {
        private readonly ClientAppSettings _clientAppSettings;

        public ClientAppSettingsController(IOptions<ClientAppSettings> clientAppSettings)
        {
            _clientAppSettings = clientAppSettings.Value;
        }

        [HttpGet]
        public IActionResult Get()
        {
            return Ok(_clientAppSettings);
        }
    }
}

Configuring the Angular application

The Angular application needs to read the settings and use these in the client application. A configClient function is used to GET the data from the server. The APP_INITIALIZER could also be used, but as the settings are been used in the main AppModule, you still have to wait for the HTTP GET request to complete.

configClient() {

	// console.log('window.location', window.location);
	// console.log('window.location.href', window.location.href);
	// console.log('window.location.origin', window.location.origin);

	return this.http.get(window.location.origin + window.location.pathname + '/api/ClientAppSettings').map(res => {
		this.clientConfiguration = res.json();
	});
}

In the constructor of the AppModule, the module subscribes to the configClient function. Here the configuration values are read and the properties are set as required for the SPA application.

clientConfiguration: any;

constructor(public oidcSecurityService: OidcSecurityService, private http: Http, private configuration: Configuration) {

	console.log('APP STARTING');
	this.configClient().subscribe(config => {

		let openIDImplicitFlowConfiguration = new OpenIDImplicitFlowConfiguration();
		openIDImplicitFlowConfiguration.stsServer = this.clientConfiguration.stsServer;
		openIDImplicitFlowConfiguration.redirect_url = this.clientConfiguration.redirect_url;
		openIDImplicitFlowConfiguration.client_id = this.clientConfiguration.client_id;
		openIDImplicitFlowConfiguration.response_type = this.clientConfiguration.response_type;
		openIDImplicitFlowConfiguration.scope = this.clientConfiguration.scope;
		openIDImplicitFlowConfiguration.post_logout_redirect_uri = this.clientConfiguration.post_logout_redirect_uri;
		openIDImplicitFlowConfiguration.start_checksession = this.clientConfiguration.start_checksession;
		openIDImplicitFlowConfiguration.silent_renew = this.clientConfiguration.silent_renew;
		openIDImplicitFlowConfiguration.startup_route = this.clientConfiguration.startup_route;
		openIDImplicitFlowConfiguration.forbidden_route = this.clientConfiguration.forbidden_route;
		openIDImplicitFlowConfiguration.unauthorized_route = this.clientConfiguration.unauthorized_route;
		openIDImplicitFlowConfiguration.log_console_warning_active = this.clientConfiguration.log_console_warning_active;
		openIDImplicitFlowConfiguration.log_console_debug_active = this.clientConfiguration.log_console_debug_active;
		openIDImplicitFlowConfiguration.max_id_token_iat_offset_allowed_in_seconds = this.clientConfiguration.max_id_token_iat_offset_allowed_in_seconds;

		this.oidcSecurityService.setupModule(openIDImplicitFlowConfiguration);

		configuration.FileServer = this.clientConfiguration.apiFileServer;
		configuration.Server = this.clientConfiguration.apiServer;
	});
}

The Configuration class can then be used throughout the SPA application.

import { Injectable } from '@angular/core';

@Injectable()
export class Configuration {
    public Server = 'read from app settings';
    public FileServer = 'read from app settings';
}

I am certain, there is a better way to do the Angular configuration, but not much information exists for this. APP_INITIALIZER is not so well documentated. Angular CLI has it’s own solution, but the configuration file cannot be read per environment.

Links:

https://docs.microsoft.com/en-us/aspnet/core/fundamentals/configuration

https://docs.microsoft.com/en-us/aspnet/core/fundamentals/environments

https://www.intertech.com/Blog/deploying-angular-4-apps-with-environment-specific-info/

https://stackoverflow.com/questions/43193049/app-settings-the-angular-4-way

https://damienbod.com/2015/10/11/asp-net-5-multiple-configurations-without-using-environment-variables/


Getting started with Angular and Redux

$
0
0

This article shows how you could setup Redux in an Angular application using ngrx. Redux provides a really great way of managing state in an Angular application. State Management is hard, and usually ends up a mess when you invent it yourself. At present, Angular provides no recommendations or solution for this.

Thanks to Fabian Gosebrink for his help in learning ngrx and Redux. The to Philip Steinebrunner for his feedback.

Code: https://github.com/damienbod/AngularRedux

The demo app uses an Angular component for displaying countries using the public API https://restcountries.eu/. The view displays regions and the countries per region. The data and the state of the component is implemented using ngrx.

Note: Read the Redux documentation to learn how it works. Here’s a quick summary of the redux store in this application:

  • There is just one store per application while you can register additional reducers for your Feature-Modules with StoreModule.forFeature() per module
  • The store has a state, actions, effects, and reducers
  • The actions define what can be done in the store. Components or effects dispatch these
  • effects are use to do API calls, etc and are attached to actions
  • reducers are attached to actions and are used to change the state

The following steps explains, what is required to get the state management setup in the Angular application, which uses an Angular service to request the data from the public API.

Step 1: Add the ngrx packages

Add the latest ngrx npm packages to the packages.json file in your project.

    "@ngrx/effects": "^4.0.5",
    "@ngrx/store": "^4.0.3",
    "@ngrx/store-devtools": "^4.0.0 ",

Step 2: Add the ngrx setup configuration to the app module.

In this app, a single Redux store will be used per module. The ngrx configuration needs to be added to the app.module and also each child module as required. The StoreModule, EffectsModule and the StoreDevtoolsModule are added to the imports array of the NgModule.

...

import { EffectsModule } from '@ngrx/effects';
import { StoreModule } from '@ngrx/store';
import { StoreDevtoolsModule } from '@ngrx/store-devtools';

@NgModule({
    imports: [
        ...
        StoreModule.forRoot({}),
        StoreDevtoolsModule.instrument({
            maxAge: 25 //  Retains last 25 states
        }),
        EffectsModule.forRoot([])
    ],

    declarations: [
        AppComponent
    ],

    bootstrap: [AppComponent],
})

export class AppModule { }

Step 3: Create the interface for the state.

This can be any type of object, array.

import { Region } from './../../models/region';

export interface CountryState {
    regions: Region[],
};

Step 4: Create the actions

Create the actions required by the components or the effects. The constructor params must match the params sent from the components or returned from the API calls.

import { Action } from '@ngrx/store';
import { Country } from './../../models/country';
import { Region } from './../../models/region';

export const SELECTALL = '[countries] Select All';
export const SELECTALL_COMPLETE = '[countries] Select All Complete';
export const SELECTREGION = '[countries] Select Region';
export const SELECTREGION_COMPLETE = '[countries] Select Region Complete';

export const COLLAPSEREGION = '[countries] COLLAPSE Region';

export class SelectAllAction implements Action {
    readonly type = SELECTALL;

    constructor() { }
}

export class SelectAllCompleteAction implements Action {
    readonly type = SELECTALL_COMPLETE;

    constructor(public countries: Country[]) { }
}

export class SelectRegionAction implements Action {
    readonly type = SELECTREGION;

    constructor(public region: Region) { }
}

export class SelectRegionCompleteAction implements Action {
    readonly type = SELECTREGION_COMPLETE;

    constructor(public region: Region) { }
}

export class CollapseRegionAction implements Action {
    readonly type = COLLAPSEREGION;

    constructor(public region: Region) { }
}

export type Actions
    = SelectAllAction
    | SelectAllCompleteAction
    | SelectRegionAction
    | SelectRegionCompleteAction
    | CollapseRegionAction;


Step 5: Create the effects

Create the effects to do the API calls. The effects are mapped to actions and when finished call another action.

import 'rxjs/add/operator/map';
import 'rxjs/add/operator/switchMap';

import { Injectable } from '@angular/core';
import { Actions, Effect } from '@ngrx/effects';
import { Action } from '@ngrx/store';
import { of } from 'rxjs/observable/of';
import { Observable } from 'rxjs/Rx';

import * as countryAction from './country.action';
import { Country } from './../../models/country';
import { CountryService } from '../../core/services/country.service';

@Injectable()
export class CountryEffects {

    @Effect() getAll$: Observable<Action> = this.actions$.ofType(countryAction.SELECTALL)
        .switchMap(() =>
            this.countryService.getAll()
                .map((data: Country[]) => {
                    return new countryAction.SelectAllCompleteAction(data);
                })
                .catch((error: any) => {
                    return of({ type: 'getAll_FAILED' })
                })
        );

    @Effect() getAllPerRegion$: Observable<Action> = this.actions$.ofType(countryAction.SELECTREGION)
        .switchMap((action: countryAction.SelectRegionAction) =>
            this.countryService.getAllPerRegion(action.region.name)
                .map((data: Country[]) => {
                    const region = { name: action.region.name, expanded: true, countries: data};
                    return new countryAction.SelectRegionCompleteAction(region);
                })
                .catch((error: any) => {
                    return of({ type: 'getAllPerRegion$' })
                })
        );
    constructor(
        private countryService: CountryService,
        private actions$: Actions
    ) { }
}

Step 6: Implement the reducers

Implement the reducer to change the state when required. The reducer takes an initial state and executes methods matching the defined actions which were dispatched from the components or the effects.

import { CountryState } from './country.state';
import { Country } from './../../models/country';
import { Region } from './../../models/region';
import { Action } from '@ngrx/store';
import * as countryAction from './country.action';

export const initialState: CountryState = {
    regions: [
        { name: 'Africa', expanded:  false, countries: [] },
        { name: 'Americas', expanded: false, countries: [] },
        { name: 'Asia', expanded: false, countries: [] },
        { name: 'Europe', expanded: false, countries: [] },
        { name: 'Oceania', expanded: false, countries: [] }
    ]
};

export function countryReducer(state = initialState, action: countryAction.Actions): CountryState {
    switch (action.type) {

        case countryAction.SELECTREGION_COMPLETE:
            return Object.assign({}, state, {
                regions: state.regions.map((item: Region) => {
                    return item.name === action.region.name ? Object.assign({}, item, action.region ) : item;
                })
            });

        case countryAction.COLLAPSEREGION:
            action.region.expanded = false;
            return Object.assign({}, state, {
                regions: state.regions.map((item: Region) => {
                    return item.name === action.region.name ? Object.assign({}, item, action.region ) : item;
                })
            });

        default:
            return state;

    }
}

Step 7: Configure the module.

Important here is how the StoreModule.forFeature is configured. The configuration must match the definitions in the components which use the store.

...
import { CountryComponent } from './components/country.component';

import { EffectsModule } from '@ngrx/effects';
import { StoreModule } from '@ngrx/store';
import { CountryEffects } from './store/country.effects';
import { countryReducer } from './store/country.reducer';

@NgModule({
    imports: [
        ...
        StoreModule.forFeature('world', {
            regions: countryReducer,
        }),
        EffectsModule.forFeature([CountryEffects])
    ],

    declarations: [
        CountryComponent
    ],

    exports: [
        CountryComponent
    ]
})

export class CountryModule { }

Step 8: Create the component

Create the component which uses the store. The constructor configures the store matching the module configuration from the forFeature and the state as required. User actions dispatch events using the actions, which if required calls the an effect function, which then calls an action and then a reducer function which changes the state.

import { Component, OnInit } from '@angular/core';
import { Store } from '@ngrx/store';
import { Observable } from 'rxjs/Observable';

import { CountryState } from '../store/country.state';
import * as CountryActions from '../store/country.action';
import { Country } from './../../models/country';
import { Region } from './../../models/region';

@Component({
    selector: 'app-country-component',
    templateUrl: './country.component.html',
    styleUrls: ['./country.component.scss']
})

export class CountryComponent implements OnInit {

    public async: any;

    regionsState$: Observable<CountryState>;

    constructor(private store: Store<any>) {
        this.regionsState$ = this.store.select<CountryState>(state => state.world.regions);
    }

    ngOnInit() {
        this.store.dispatch(new CountryActions.SelectAllAction());
    }

    public getCountries(region: Region) {
        this.store.dispatch(new CountryActions.SelectRegionAction(region));
    }

    public collapse(region: Region) {
         this.store.dispatch(new CountryActions.CollapseRegionAction(region));
    }
}

Step 9: Use the state objects in the HTML template.

It is important not to forget to use the async pipe when using the state from ngrx. Now the view is independent from the API calls and when the state is changed, it is automatically updated, or other components which use the same state.

<div class="container-fluid">
    <div class="row" *ngIf="(regionsState$|async)?.regions?.length > 0">
        <div class="table-responsive">
            <table class="table">
                <thead>
                    <tr>
                        <th>#</th>
                        <th>Name</th>
                        <th>Population</th>
                        <th>Capital</th>
                        <th>Flag</th>
                    </tr>
                </thead>
                <tbody>
                    <ng-container *ngFor="let region of (regionsState$|async)?.regions; let i = index">
                        <tr>
                            <td class="text-left td-table-region" *ngIf="!region.expanded">
                                <span (click)="getCountries(region)">►</span>
                            </td>
                            <td class="text-left td-table-region" *ngIf="region.expanded">
                                <span type="button" (click)="collapse(region)">▼</span>
                            </td>
                            <td class="td-table-region">{{region.name}}</td>
                            <td class="td-table-region"> </td>
                            <td class="td-table-region"> </td>
                            <td class="td-table-region"> </td>
                        </tr>
                        <ng-container *ngIf="region.expanded">
                            <tr *ngFor="let country of region.countries; let i = index">
                                <td class="td-table-country">    {{i + 1}}</td>
                                <td class="td-table-country">{{country.name}}</td>
                                <td class="td-table-country" >{{country.population}}</td>
                                <td>{{country.capital}}</td>
                                <td><img width="100" [src]="country.flag"></td>
                            </tr>
                        </ng-container>
                    </ng-container>
                </tbody>
            </table>
        </div>
    </div>

    <!--▼ ►   <span class="glyphicon glyphicon-ok" aria-hidden="true" style="color: darkgreen;"></span>-->
    <div class="row" *ngIf="(regionsState$|async)?.regions?.length <= 0">
        <span>No items found</span>
    </div>
</div>

Redux DEV Tools

The redux-devtools chrome extension is really excellent. Add this to Chrome and start the application.

When you start the application, and open it in Chrome, and the Redux state can be viewed, explored changed and tested. This gives you an easy way to view the state and also display what happened inside the application. You can even remove state changes using this tool, too see a different history and change the value of the actual state.

The actual state can be viewed:

Links:

https://github.com/ngrx

https://egghead.io/courses/getting-started-with-redux

http://redux.js.org/

https://github.com/ngrx/platform/blob/master/docs/store-devtools/README.md

https://chrome.google.com/webstore/detail/redux-devtools/lmhkpmbekcpmknklioeibfkpmmfibljd?hl=en

https://restcountries.eu/

http://onehungrymind.com/build-better-angular-2-application-redux-ngrx/

https://egghead.io/courses/building-a-time-machine-with-angular-2-and-rxjs


Getting started with SignalR using ASP.NET Core and Angular

$
0
0

This article shows how to setup a first SignalR Hub in ASP.NET Core 2.0 and use it with an Angular client. SignalR will be released with dotnet 2.1. Thanks to Dennis Alberti for his help in setting up the code example.

Code: https://github.com/damienbod/AspNetCoreAngularSignalR

2017-09-15: Updated @aspnet/signalr-client to use npm feed, and 1.0.0-alpha1-final

The required SignalR Nuget packages and npm packages are at present hosted on MyGet. Your need to add the SignalR packagesto the csproj file. To use the MyGet feed, add the https://dotnet.myget.org/F/aspnetcore-ci-dev/api/v3/index.json to your package sources.

<Project Sdk="Microsoft.NET.Sdk.Web">
  <PropertyGroup>
    <TargetFramework>netcoreapp2.0</TargetFramework>
  </PropertyGroup>
  <ItemGroup>
    <PackageReference Include="Microsoft.AspNetCore.All" Version="2.0.0" />
    <PackageReference Include="Microsoft.AspNetCore.SignalR" Version="1.0.0-alpha1-final" />
  </ItemGroup>
  <ItemGroup>
    <DotNetCliToolReference Include="Microsoft.EntityFrameworkCore.Tools.DotNet" Version="2.0.0" />
    <DotNetCliToolReference Include="Microsoft.Extensions.SecretManager.Tools" Version="2.0.0" />
    <DotNetCliToolReference Include="Microsoft.VisualStudio.Web.CodeGeneration.Tools" Version="2.0.0" />
  </ItemGroup>
  <ItemGroup>
    <Folder Include="angularApp\app\models\" />
  </ItemGroup>
</Project>

Now create a simple default hub.

using Microsoft.AspNetCore.SignalR;
using System.Threading.Tasks;

namespace AspNetCoreSignalr.SignalRHubs
{
    public class LoopyHub : Hub
    {
        public Task Send(string data)
        {
            return Clients.All.InvokeAsync("Send", data);
        }
    }
}

Add the SignalR configuration in the startup class. The hub which was created before needs to be added in the UseSignalR extension method.

public void ConfigureServices(IServiceCollection services)
{
	...
	services.AddSignalR();
	...
}

public void Configure(IApplicationBuilder app, IHostingEnvironment env, ILoggerFactory loggerFactory)
{
	...

	app.UseSignalR(routes =>
	{
		routes.MapHub<LoopyHub>("loopy");
	});

	...
}

Setup the Angular application. The Angular application is setup using a wepback build and all dependencies are added to the packages.json file.

You can use the The MyGet npm feed if you want to use the aspnetcore-ci-dev. You can do this using a .npmrc file in the project root. Add the registry path. If using the npm package, do not add this.

@aspnet:registry=https://dotnet.myget.org/f/aspnetcore-ci-dev/npm/

Now add the required SignalR npm packages to the packages.json file. Using the npm package from NuGet:

 "dependencies": {
    "@angular/animations": "4.4.0-RC.0",
    "@angular/common": "4.4.0-RC.0",
    "@angular/compiler": "4.4.0-RC.0",
    "@angular/compiler-cli": "4.4.0-RC.0",
    "@angular/core": "4.4.0-RC.0",
    "@angular/forms": "4.4.0-RC.0",
    "@angular/http": "4.4.0-RC.0",
    "@angular/platform-browser": "4.4.0-RC.0",
    "@angular/platform-browser-dynamic": "4.4.0-RC.0",
    "@angular/platform-server": "4.4.0-RC.0",
    "@angular/router": "4.4.0-RC.0",
    "@angular/upgrade": "4.4.0-RC.0",

    "msgpack5": "^3.5.1",
    "@aspnet/signalr-client": "1.0.0-alpha1-final"
  },

Add the SignalR client code. In this basic example, it is just added directly in a component. The sendMessage funtion sends messages and the hubConnection.on function recieves all messages including its own.

import { Component, OnInit } from '@angular/core';
import { Observable } from 'rxjs/Observable';
import { HubConnection } from '@aspnet/signalr-client';

@Component({
    selector: 'app-home-component',
    templateUrl: './home.component.html'
})

export class HomeComponent implements OnInit {
    private _hubConnection: HubConnection;
    public async: any;
    message = '';
    messages: string[] = [];

    constructor() {
    }

    public sendMessage(): void {
        const data = `Sent: ${this.message}`;

        this._hubConnection.invoke('Send', data);
        this.messages.push(data);
    }

    ngOnInit() {
        this._hubConnection = new HubConnection('/loopy');

        this._hubConnection.on('Send', (data: any) => {
            const recieved = `Recieved: ${data}`;
            this.messages.push(recieved);
        });

        this._hubConnection.start()
            .then(() => {
                console.log('Hub connection started')
            })
            .catch(err => {
                console.log('Error while establishing connection')
            });
    }

}

The messages are then displayed in the component template.

<div class="container-fluid">

    <h1>Send some basic messages</h1>


    <div class="row">
        <form class="form-inline" (ngSubmit)="sendMessage()" #messageForm="ngForm">
            <div class="form-group">
                <label class="sr-only" for="message">Message</label>
                <input type="text" class="form-control" id="message" placeholder="your message..." name="message" [(ngModel)]="message" required>
            </div>
            <button type="submit" class="btn btn-primary" [disabled]="!messageForm.valid">Send SignalR Message</button>
        </form>
    </div>
    <div class="row" *ngIf="messages.length > 0">
        <div class="table-responsive">
            <table class="table table-striped">
                <thead>
                    <tr>
                        <th>#</th>
                        <th>Messages</th>
                    </tr>
                </thead>
                <tbody>
                    <tr *ngFor="let message of messages; let i = index">
                        <td>{{i + 1}}</td>
                        <td>{{message}}</td>
                    </tr>
                </tbody>
            </table>
        </div>
    </div>
    <div class="row" *ngIf="messages.length <= 0">
        <span>No messages</span>
    </div>
</div>

Now the first really simple SignalR Hub is setup and an Angular client can send and recieve messages.

Links:

https://github.com/aspnet/SignalR#readme

https://www.npmjs.com/package/@aspnet/signalr-client

https://dotnet.myget.org/F/aspnetcore-ci-dev/api/v3/index.json

https://dotnet.myget.org/F/aspnetcore-ci-dev/npm/

https://dotnet.myget.org/feed/aspnetcore-ci-dev/package/npm/@aspnet/signalr-client

https://www.npmjs.com/package/msgpack5


SignalR Group messages with ngrx and Angular

$
0
0

This article shows how SignalR can be used to send grouped messages to an Angular SignalR client, which uses ngrx to handle the SignalR events in the Angular client.

Code: https://github.com/damienbod/AspNetCoreAngularSignalR

Other posts in this series:

SignalR Groups

SignalR allows messages to be sent to specific groups if required. You can read about this here:

https://docs.microsoft.com/en-us/aspnet/signalr/overview/guide-to-the-api/working-with-groups

The documentation is for the old SignalR, but most is still relevant.

To get started, add the SignalR Nuget package to the csproj file where the Hub(s) are to be implemented.

<PackageReference Include="Microsoft.AspNetCore.SignalR" Version="1.0.0-alpha1-final" />

In this application, the NewsItem class is used to send the messages between the SignalR clients and server.

namespace AspNetCoreAngularSignalR.SignalRHubs
{
    public class NewsItem
    {
        public string Header { get; set; }
        public string NewsText { get; set; }
        public string Author { get; set; }
        public string NewsGroup { get; set; }
    }
}

The NewsHub class implements the SignalR Hub which can send messages with NewsItem classes, or let the clients join, or leave a SignalR group. When the Send method is called, the class uses the NewsGroup property to send the messages only to clients in the group. If the client is not a member of the group, it will receive no message.

using Microsoft.AspNetCore.SignalR;
using System.Threading.Tasks;

namespace AspNetCoreAngularSignalR.SignalRHubs
{
    public class NewsHub : Hub
    {
        public Task Send(NewsItem newsItem)
        {
            return Clients.Group(newsItem.NewsGroup).InvokeAsync("Send", newsItem);
        }

        public async Task JoinGroup(string groupName)
        {
            await Groups.AddAsync(Context.ConnectionId, groupName);
            await Clients.Group(groupName).InvokeAsync("JoinGroup", groupName);
        }

        public async Task LeaveGroup(string groupName)
        {
            await Clients.Group(groupName).InvokeAsync("LeaveGroup", groupName);
            await Groups.RemoveAsync(Context.ConnectionId, groupName);
        }
    }
}

The SignalR hub is configured in the Startup class. The path defined in the hub, must match the configuration in the SignalR client.

app.UseSignalR(routes =>
{
	routes.MapHub<NewssHub>("looney");
});

Angular Service for the SignalR client

To use SignalR in the Angular application, the npm package @aspnet/signalr-client needs to be added to the packages.json file.

"@aspnet/signalr-client": "1.0.0-alpha1-final"

The Angular NewsService is used to send SignalR events to the ASP.NET Core server and also to handle the messages received from the server. The send, joinGroup and leaveGroup functions are used in the ngrx store effects and the init method adds event handlers for SignalR events and dispatches ngrx actions when a message is received.

import { Injectable } from '@angular/core';
import { Observable } from 'rxjs/Observable';
import { HubConnection } from '@aspnet/signalr-client';
import { NewsItem } from './models/news-item';
import { Store } from '@ngrx/store';
import { NewsState } from './store/news.state';
import * as NewsActions from './store/news.action';

@Injectable()
export class NewsService {

    private _hubConnection: HubConnection;

    constructor(private store: Store<any>) {
        this.init();
    }

    public send(newsItem: NewsItem): NewsItem {
        this._hubConnection.invoke('Send', newsItem);
        return newsItem;
    }

    public joinGroup(group: string): void {
        this._hubConnection.invoke('JoinGroup', group);
    }

    public leaveGroup(group: string): void {
        this._hubConnection.invoke('LeaveGroup', group);
    }

    private init() {

        this._hubConnection = new HubConnection('/looney');

        this._hubConnection.on('Send', (newsItem: NewsItem) => {
            this.store.dispatch(new NewsActions.ReceivedItemAction(newsItem));
        });

        this._hubConnection.on('JoinGroup', (data: string) => {
            this.store.dispatch(new NewsActions.ReceivedGroupJoinedAction(data));
        });

        this._hubConnection.on('LeaveGroup', (data: string) => {
            this.store.dispatch(new NewsActions.ReceivedGroupLeftAction(data));
        });

        this._hubConnection.start()
            .then(() => {
                console.log('Hub connection started')
            })
            .catch(err => {
                console.log('Error while establishing connection')
            });
    }

}

Using ngrx to manage SignalR events

The NewsState interface is used to save the application state created from the SignalR events, and the user interactions.

import { NewsItem } from '../models/news-item';

export interface NewsState {
    newsItems: NewsItem[],
    groups: string[]
};

The news.action action classes are used to connect, define the actions for events which are dispatched from Angular components, the SignalR Angular service, or ngrx effects. These actions are used in the hubConnection.on event, which receives the SignalR messages, and dispatches the proper action.

import { Action } from '@ngrx/store';
import { NewsItem } from '../models/news-item';

export const JOIN_GROUP = '[news] JOIN_GROUP';
export const LEAVE_GROUP = '[news] LEAVE_GROUP';
export const JOIN_GROUP_COMPLETE = '[news] JOIN_GROUP_COMPLETE';
export const LEAVE_GROUP_COMPLETE = '[news] LEAVE_GROUP_COMPLETE';
export const SEND_NEWS_ITEM = '[news] SEND_NEWS_ITEM';
export const SEND_NEWS_ITEM_COMPLETE = '[news] SEND_NEWS_ITEM_COMPLETE';
export const RECEIVED_NEWS_ITEM = '[news] RECEIVED_NEWS_ITEM';
export const RECEIVED_GROUP_JOINED = '[news] RECEIVED_GROUP_JOINED';
export const RECEIVED_GROUP_LEFT = '[news] RECEIVED_GROUP_LEFT';

export class JoinGroupAction implements Action {
    readonly type = JOIN_GROUP;

    constructor(public group: string) { }
}

export class LeaveGroupAction implements Action {
    readonly type = LEAVE_GROUP;

    constructor(public group: string) { }
}


export class JoinGroupActionComplete implements Action {
    readonly type = JOIN_GROUP_COMPLETE;

    constructor(public group: string) { }
}

export class LeaveGroupActionComplete implements Action {
    readonly type = LEAVE_GROUP_COMPLETE;

    constructor(public group: string) { }
}
export class SendNewsItemAction implements Action {
    readonly type = SEND_NEWS_ITEM;

    constructor(public newsItem: NewsItem) { }
}

export class SendNewsItemActionComplete implements Action {
    readonly type = SEND_NEWS_ITEM_COMPLETE;

    constructor(public newsItem: NewsItem) { }
}

export class ReceivedItemAction implements Action {
    readonly type = RECIEVED_NEWS_ITEM;

    constructor(public newsItem: NewsItem) { }
}

export class ReceivedGroupJoinedAction implements Action {
    readonly type = RECIEVED_GROUP_JOINED;

    constructor(public group: string) { }
}

export class ReceivedGroupLeftAction implements Action {
    readonly type = RECIEVED_GROUP_LEFT;

    constructor(public group: string) { }
}

export type Actions
    = JoinGroupAction
    | LeaveGroupAction
    | JoinGroupActionComplete
    | LeaveGroupActionComplete
    | SendNewsItemAction
    | SendNewsItemActionComplete
    | ReceivedItemAction
    | ReceivedGroupJoinedAction
    | ReceivedGroupLeftAction;


The newsReducer ngrx reducer class receives the actions and changes the state as required. For example, when a RECEIVED_NEWS_ITEM event is sent from the Angular SignalR service, it creates a new state with the new message appended to the existing items.

import { NewsState } from './news.state';
import { NewsItem } from '../models/news-item';
import { Action } from '@ngrx/store';
import * as newsAction from './news.action';

export const initialState: NewsState = {
    newsItems: [],
    groups: ['group']
};

export function newsReducer(state = initialState, action: newsAction.Actions): NewsState {
    switch (action.type) {

        case newsAction.RECEIVED_GROUP_JOINED:
            return Object.assign({}, state, {
                newsItems: state.newsItems,
                groups: (state.groups.indexOf(action.group) > -1) ? state.groups : state.groups.concat(action.group)
            });

        case newsAction.RECEIVED_NEWS_ITEM:
            return Object.assign({}, state, {
                newsItems: state.newsItems.concat(action.newsItem),
                groups: state.groups
            });

        case newsAction.RECEIVED_GROUP_LEFT:
            const data = [];
            for (const entry of state.groups) {
                if (entry !== action.group) {
                    data.push(entry);
                }
            }
            console.log(data);
            return Object.assign({}, state, {
                newsItems: state.newsItems,
                groups: data
            });
        default:
            return state;

    }
}

The ngrx store is configured in the module class.

StoreModule.forFeature('news', {
     newsitems: newsReducer,
}),
 EffectsModule.forFeature([NewsEffects])

The store is then used in the different Angular components. The component only uses the ngrx store to send, receive SignalR data.

import { Component, OnInit } from '@angular/core';
import { Observable } from 'rxjs/Observable';
import { Store } from '@ngrx/store';
import { NewsState } from '../store/news.state';
import * as NewsActions from '../store/news.action';
import { NewsItem } from '../models/news-item';

@Component({
    selector: 'app-news-component',
    templateUrl: './news.component.html'
})

export class NewsComponent implements OnInit {
    public async: any;
    newsItem: NewsItem;
    group = 'group';
    newsState$: Observable<NewsState>;

    constructor(private store: Store<any>) {
        this.newsState$ = this.store.select<NewsState>(state => state.news.newsitems);
        this.newsItem = new NewsItem();
        this.newsItem.AddData('', '', 'me', this.group);
    }

    public sendNewsItem(): void {
        this.newsItem.NewsGroup = this.group;
        this.store.dispatch(new NewsActions.SendNewsItemAction(this.newsItem));
    }

    public join(): void {
        this.store.dispatch(new NewsActions.JoinGroupAction(this.group));
    }

    public leave(): void {
        this.store.dispatch(new NewsActions.LeaveGroupAction(this.group));
    }

    ngOnInit() {
    }
}

The component template then displays the data as required.

<div class="container-fluid">

    <h1>Send some basic news messages</h1>

    <div class="row">
        <form class="form-inline" >
            <div class="form-group">
                <label for="header">Group</label>
                <input type="text" class="form-control" id="header" placeholder="your header..." name="header" [(ngModel)]="group" required>
            </div>
            <button class="btn btn-primary" (click)="join()">Join</button>
            <button class="btn btn-primary" (click)="leave()">Leave</button>
        </form>
    </div>
    <hr />
    <div class="row">
        <form class="form" (ngSubmit)="sendNewsItem()" #newsItemForm="ngForm">
            <div class="form-group">
                <label for="header">Header</label>
                <input type="text" class="form-control" id="header" placeholder="your header..." name="header" [(ngModel)]="newsItem.Header" required>
            </div>
            <div class="form-group">
                <label for="newsText">Text</label>
                <input type="text" class="form-control" id="newsText" placeholder="your newsText..." name="newsText" [(ngModel)]="newsItem.NewsText" required>
            </div>
            <div class="form-group">
                <label for="newsText">Author</label>
                <input type="text" class="form-control" id="author" placeholder="your newsText..." name="author" [(ngModel)]="newsItem.Author" required>
            </div>
            <button type="submit" class="btn btn-primary" [disabled]="!newsItemForm.valid">Send News to: {{group}}</button>
        </form>
    </div>

    <div class="row" *ngIf="(newsState$|async)?.newsItems.length > 0">
        <div class="table-responsive">
            <table class="table table-striped">
                <thead>
                    <tr>
                        <th>#</th>
                        <th>header</th>
                        <th>Text</th>
                        <th>Author</th>
                        <th>roup</th>
                    </tr>
                </thead>
                <tbody>
                    <tr *ngFor="let item of (newsState$|async)?.newsItems; let i = index">
                        <td>{{i + 1}}</td>
                        <td>{{item.Header}}</td>
                        <td>{{item.NewsText}}</td>
                        <td>{{item.Author}}</td>
                        <td>{{item.NewsGroup}}</td>
                    </tr>
                </tbody>
            </table>
        </div>
    </div>

    <div class="row" *ngIf="(newsState$|async)?.length <= 0">
        <span>No news items</span>
    </div>
</div>

When the application is started, SignalR messages can be sent, received and displayed from the instances of the Angaulr application.


Links

https://github.com/aspnet/SignalR#readme

https://github.com/ngrx

https://www.npmjs.com/package/@aspnet/signalr-client

https://dotnet.myget.org/F/aspnetcore-ci-dev/api/v3/index.json

https://dotnet.myget.org/F/aspnetcore-ci-dev/npm/

https://dotnet.myget.org/feed/aspnetcore-ci-dev/package/npm/@aspnet/signalr-client

https://www.npmjs.com/package/msgpack5


Auto redirect to an STS server in an Angular app using oidc Implicit Flow

$
0
0

This article shows how to implement an auto redirect in an Angular application, if using the OIDC Implicit Flow with an STS server. When a user opens the application, it is sometimes required that the user is automatically redirected to the login page on the STS server. This can be tricky to implement, as you need to know when to redirect and when not. The OIDC client is implemented using the angular-auth-oidc-client npm package.

Code: https://github.com/damienbod/angular-auth-oidc-sample-google-openid

The angular-auth-oidc-client npm package provides an event when the OIDC module is ready to use and also can be configured to emit an event to inform the using component when the callback from the STS server has been processed. These 2 events, can be used to implement the auto redirect to the STS server, when not authorized.

The app.component can subscribe to these 2 events in the constructor.

constructor(public oidcSecurityService: OidcSecurityService,
	private router: Router
) {
	if (this.oidcSecurityService.moduleSetup) {
		this.onOidcModuleSetup();
	} else {
		this.oidcSecurityService.onModuleSetup.subscribe(() => {
			this.onOidcModuleSetup();
		});
	}

	this.oidcSecurityService.onAuthorizationResult.subscribe(
		(authorizationResult: AuthorizationResult) => {
			this.onAuthorizationResultComplete(authorizationResult);
		});
}

The onOidcModuleSetup function handles the onModuleSetup event. The Angular app is configured not to use hash (#) urls so that the STS callback is the only redirect which uses the hash. Due to this, all urls with a hash can be sent on to be processed from the OIDC module. If any other path is called, apart from the auto-login, the path is saved to the local storage. This is done so that after a successful token validation, the user is redirected back to the correct route. If the user is not authorized, the auto-login component is called.

private onOidcModuleSetup() {
	if (window.location.hash) {
		this.oidcSecurityService.authorizedCallback();
	} else {
		if ('/autologin' !== window.location.pathname) {
			this.write('redirect', window.location.pathname);
		}
		console.log('AppComponent:onModuleSetup');
		this.oidcSecurityService.getIsAuthorized().subscribe((authorized: boolean) => {
			if (!authorized) {
				this.router.navigate(['/autologin']);
			}
		});
	}
}

The onAuthorizationResultComplete function handles the onAuthorizationResult event. If the response from the server is valid, the user of the application is redirected using the saved path from the local storage.

private onAuthorizationResultComplete(authorizationResult: AuthorizationResult) {
	console.log('AppComponent:onAuthorizationResultComplete');
	const path = this.read('redirect');
	if (authorizationResult === AuthorizationResult.authorized) {
		this.router.navigate([path]);
	} else {
		this.router.navigate(['/Unauthorized']);
	}
}

The onAuthorizationResult event is only emitted if the trigger_authorization_result_event configuration property is set to true.

constructor(public oidcSecurityService: OidcSecurityService) {

 let openIDImplicitFlowConfiguration = new OpenIDImplicitFlowConfiguration();
 openIDImplicitFlowConfiguration.stsServer = 'https://accounts.google.com';
 ...
 openIDImplicitFlowConfiguration.trigger_authorization_result_event = true;

 this.oidcSecurityService.setupModule(openIDImplicitFlowConfiguration);
}

The auto-login component redirects correctly to the STS server with the correct parameters for the application without any user interaction.

import { Component, OnInit, OnDestroy } from '@angular/core';
import { Router } from '@angular/router';
import { Subscription } from 'rxjs/Subscription';
import { OidcSecurityService, AuthorizationResult } from 'angular-auth-oidc-client';

@Component({
    selector: 'app-auto-component',
    templateUrl: './auto-login.component.html'
})

export class AutoLoginComponent implements OnInit, OnDestroy {
    lang: any;

    constructor(public oidcSecurityService: OidcSecurityService
    ) {
        this.oidcSecurityService.onModuleSetup.subscribe(() => { this.onModuleSetup(); });
    }

    ngOnInit() {
        if (this.oidcSecurityService.moduleSetup) {
            this.onModuleSetup();
        }
    }

    ngOnDestroy(): void {
        this.oidcSecurityService.onModuleSetup.unsubscribe();
    }

    private onModuleSetup() {
        this.oidcSecurityService.authorize();
    }
}

The auto-login component is also added to the routes.

import { Routes, RouterModule } from '@angular/router';
import { AutoLoginComponent } from './auto-login/auto-login.component';
...

const appRoutes: Routes = [
    { path: '', component: HomeComponent },
    { path: 'home', component: HomeComponent },
    { path: 'autologin', component: AutoLoginComponent },
    ...
];

export const routing = RouterModule.forRoot(appRoutes);

Now the user is auto redirected to the login page of the STS server when opening the Angular SPA application.

Links:

https://www.npmjs.com/package/angular-auth-oidc-client

https://github.com/damienbod/angular-auth-oidc-client


Using EF Core and SQLite to persist SignalR Group messages in ASP.NET Core

$
0
0

The article shows how SignalR messages can be saved to a database using EF Core and SQLite. The post uses the SignalR Hub created in this blog; SignalR Group messages with ngrx and Angular, and extends it so that users can only join an existing SignalR group. The group history is then sent to the client that joined.

Code: https://github.com/damienbod/AspNetCoreAngularSignalR

Other posts in this series:

Creating the Database Store.

To create a store for the SignalR Hub, an EF Core Context is created and also the store logic which is responsible for accessing the database. The NewsContext class is really simple and just provides 2 DbSets, NewsItemEntities which will be used to save the SignalR messages, and NewsGroups which is used to validate and create the groups in the SignalR Hub.

using System;
using System.Linq;
using Microsoft.EntityFrameworkCore;

namespace AspNetCoreAngularSignalR.Providers
{
    public class NewsContext : DbContext
    {
        public NewsContext(DbContextOptions<NewsContext> options) :base(options)
        { }

        public DbSet<NewsItemEntity> NewsItemEntities { get; set; }

        public DbSet<NewsGroup> NewsGroups { get; set; }
    }
}

The NewsStore provides the methods which will be used in the Hub and also an ASP.NET Core Controller to create, select the groups if required. The NewsStore uses the NewsContext class.

using AspNetCoreAngularSignalR.SignalRHubs;
using System;
using System.Collections.Generic;
using System.Linq;

namespace AspNetCoreAngularSignalR.Providers
{
    public class NewsStore
    {
        public NewsStore(NewsContext newsContext)
        {
            _newsContext = newsContext;
        }

        private readonly NewsContext _newsContext;

        public void AddGroup(string group)
        {
            _newsContext.NewsGroups.Add(new NewsGroup
            {
                Name = group
            });
            _newsContext.SaveChanges();
        }

        public bool GroupExists(string group)
        {
            var item = _newsContext.NewsGroups.FirstOrDefault(t => t.Name == group);
            if(item == null)
            {
                return false;
            }

            return true;
        }

        public void CreateNewItem(NewsItem item)
        {
            if (GroupExists(item.NewsGroup))
            {
                _newsContext.NewsItemEntities.Add(new NewsItemEntity
                {
                    Header = item.Header,
                    Author = item.Author,
                    NewsGroup = item.NewsGroup,
                    NewsText = item.NewsText
                });
                _newsContext.SaveChanges();
            }
            else
            {
                throw new System.Exception("group does not exist");
            }
        }

        public IEnumerable<NewsItem> GetAllNewsItems(string group)
        {
            return _newsContext.NewsItemEntities.Where(item => item.NewsGroup == group).Select(z =>
                new NewsItem {
                    Author = z.Author,
                    Header = z.Header,
                    NewsGroup = z.NewsGroup,
                    NewsText = z.NewsText
                });
        }

        public List<string> GetAllGroups()
        {
            return _newsContext.NewsGroups.Select(t =>  t.Name ).ToList();
        }
    }
}

The NewsStore and the NewsContext are registered in the ConfigureServices method in the Startup class. The SignalR Hub is a singleton and so the NewsContext and the NewsStore classes are added as singletons. The AddDbContext requires the ServiceLifetime.Singleton parameter as this is not default. This is not optimal when using the NewsContext in the ASP.NET Core controller, as you need to consider the possible multiple client requests.

public void ConfigureServices(IServiceCollection services)
{
	var sqlConnectionString = Configuration.GetConnectionString("DefaultConnection");

	services.AddDbContext<NewsContext>(options =>
		options.UseSqlite(
			sqlConnectionString
		), ServiceLifetime.Singleton
	);

	services.AddCors(options =>
	{
		options.AddPolicy("AllowAllOrigins",
			builder =>
			{
				builder
					.AllowAnyOrigin()
					.AllowAnyHeader()
					.AllowAnyMethod();
			});
	});

	services.AddSingleton<NewsStore>();
	services.AddSignalR();
	services.AddMvc();
}

Updating the SignalR Hub

The SignalR NewsHub uses the NewsStore which is injected using constructor injection. If a message is sent, or received, it is persisted using the CreateNewItem method from the store. When a new user joins an existing group, the history is sent to the client by invoking the “History” message.

using AspNetCoreAngularSignalR.Providers;
using Microsoft.AspNetCore.SignalR;
using System.Threading.Tasks;

namespace AspNetCoreAngularSignalR.SignalRHubs
{
    public class NewsHub : Hub
    {
        private NewsStore _newsStore;

        public NewsHub(NewsStore newsStore)
        {
            _newsStore = newsStore;
        }

        public Task Send(NewsItem newsItem)
        {
            if(!_newsStore.GroupExists(newsItem.NewsGroup))
            {
                throw new System.Exception("cannot send a news item to a group which does not exist.");
            }

            _newsStore.CreateNewItem(newsItem);
            return Clients.Group(newsItem.NewsGroup).InvokeAsync("Send", newsItem);
        }

        public async Task JoinGroup(string groupName)
        {
            if (!_newsStore.GroupExists(groupName))
            {
                throw new System.Exception("cannot join a group which does not exist.");
            }

            await Groups.AddAsync(Context.ConnectionId, groupName);
            await Clients.Group(groupName).InvokeAsync("JoinGroup", groupName);

            var history = _newsStore.GetAllNewsItems(groupName);
            await Clients.Client(Context.ConnectionId).InvokeAsync("History", history);
        }

        public async Task LeaveGroup(string groupName)
        {
            if (!_newsStore.GroupExists(groupName))
            {
                throw new System.Exception("cannot leave a group which does not exist.");
            }

            await Clients.Group(groupName).InvokeAsync("LeaveGroup", groupName);
            await Groups.RemoveAsync(Context.ConnectionId, groupName);
        }
    }
}

A NewsController is used to select all the existing groups, or add a new group, which is used by the SignalR Hub.

using AspNetCoreAngularSignalR.SignalRHubs;
using System.Collections.Generic;
using System.Linq;
using Microsoft.AspNetCore.Mvc;
using Microsoft.AspNetCore.SignalR;
using AspNetCoreAngularSignalR.Providers;

namespace AspNetCoreAngularSignalR.Controllers
{
    [Route("api/[controller]")]
    public class NewsController : Controller
    {
        private NewsStore _newsStore;

        public NewsController(NewsStore newsStore)
        {
            _newsStore = newsStore;
        }

        [HttpPost]
        public IActionResult AddGroup([FromQuery] string group)
        {
            if (string.IsNullOrEmpty(group))
            {
                return BadRequest();
            }
            _newsStore.AddGroup(group);
            return Created("AddGroup", group);
        }

        public List<string> GetAllGroups()
        {
            return _newsStore.GetAllGroups();
        }
    }
}

Using the SignalR Hub

The NewsService Angular service, listens for SignalR events and handles these using the ngrx store.

import 'rxjs/add/operator/map';

import { HttpClient, HttpHeaders } from '@angular/common/http';
import { Injectable } from '@angular/core';
import { Observable } from 'rxjs/Observable';

import { HubConnection } from '@aspnet/signalr-client';
import { NewsItem } from './models/news-item';
import { Store } from '@ngrx/store';
import { NewsState } from './store/news.state';
import * as NewsActions from './store/news.action';

@Injectable()
export class NewsService {

    private _hubConnection: HubConnection;
    private actionUrl: string;
    private headers: HttpHeaders;

    constructor(private http: HttpClient,
        private store: Store<any>
    ) {
        this.init();
        this.actionUrl = 'http://localhost:5000/api/news/';

        this.headers = new HttpHeaders();
        this.headers = this.headers.set('Content-Type', 'application/json');
        this.headers = this.headers.set('Accept', 'application/json');
    }

    send(newsItem: NewsItem): NewsItem {
        this._hubConnection.invoke('Send', newsItem);
        return newsItem;
    }

    joinGroup(group: string): void {
        this._hubConnection.invoke('JoinGroup', group);
    }

    leaveGroup(group: string): void {
        this._hubConnection.invoke('LeaveGroup', group);
    }

    getAllGroups(): Observable<string[]> {
        return this.http.get<string[]>(this.actionUrl, { headers: this.headers });
    }

    private init() {

        this._hubConnection = new HubConnection('/looney');

        this._hubConnection.on('Send', (newsItem: NewsItem) => {
            this.store.dispatch(new NewsActions.ReceivedItemAction(newsItem));
        });

        this._hubConnection.on('JoinGroup', (data: string) => {
            this.store.dispatch(new NewsActions.ReceivedGroupJoinedAction(data));
        });

        this._hubConnection.on('LeaveGroup', (data: string) => {
            this.store.dispatch(new NewsActions.ReceivedGroupLeftAction(data));
        });

        this._hubConnection.on('History', (newsItems: NewsItem[]) => {
            this.store.dispatch(new NewsActions.ReceivedGroupHistoryAction(newsItems));
        });

        this._hubConnection.start()
            .then(() => {
                console.log('Hub connection started')
            })
            .catch(err => {
                console.log('Error while establishing connection')
            });
    }

}

In the Angular application, when the user joins a group, he/she receives all the existing messages.

original pic: https://damienbod.files.wordpress.com/2017/09/signlargroups.gif

Links

https://github.com/aspnet/SignalR

https://github.com/aspnet/SignalR#readme

https://github.com/ngrx

https://www.npmjs.com/package/@aspnet/signalr-client

https://dotnet.myget.org/F/aspnetcore-ci-dev/api/v3/index.json

https://dotnet.myget.org/F/aspnetcore-ci-dev/npm/

https://dotnet.myget.org/feed/aspnetcore-ci-dev/package/npm/@aspnet/signalr-client

https://www.npmjs.com/package/msgpack5


Securing an Angular SignalR client using JWT tokens with ASP.NET Core and IdentityServer4

$
0
0

This post shows how an Angular SignalR client can send secure messages using JWT bearer tokens with an API and an STS server. The STS server is implemented using IdentityServer4 and the API is implemented using ASP.NET Core.

Code: https://github.com/damienbod/AspNetCoreAngularSignalRSecurity

Posts in this series:

SignalR and SPAs

At present there are 3 ways which SignalR could be secured:

Comment from Damien Edwards:
The debate over HTTPS URLs (including query strings) is long and on-going. Yes, it’s not ideal to send sensitive data in the URL even when over HTTPS. But the fact remains that when using the browser WebSocket APIs there is no other way. You only have 3 options:

  • Use cookies
  • Send tokens in query string
  • Send tokens over the WebSocket itself after onconnect

A usable sample of the last would be interesting in my mind, but I’m not expecting it to be trivial.

For an SPA client, cookies is not an option and should not be used. It is unknown if the 3rd option will work, so at present, the only way to do this, is to send the access token in the query string using HTTPS. Sending tokens in the query string has its problems, which you will need to accept and/or setup you deployment, logging to protect againt these increased risks when compared with sending the access token in the header.

Setup

The demo app is setup using 3 different projects, the API which hosts the SignalR Hub and the APIs, the STS server using ASP.NET Core and IdentityServer4 and the client application using Angular hosted in ASP.NET Core.

The client is secured using the OpenID Implicit Flow using the “id_token token” flow. The access token is then used to access the API, for both the SignalR messages and also the API calls.
All three apllications run using HTTPS.

Securing the SignalR Hub on the API

The SignalR Hub uses the Authorize attribute like any ASP.NET Core MVC controller. Policies and the scheme can be defined here. The Hub uses the Bearer AuthenticationSchemes.

using ApiServer.Providers;
using Microsoft.AspNetCore.Authorization;
using Microsoft.AspNetCore.SignalR;
using System.Threading.Tasks;

namespace ApiServer.SignalRHubs
{
    [Authorize(AuthenticationSchemes = "Bearer")]
    public class NewsHub : Hub
    {
        private NewsStore _newsStore;

        public NewsHub(NewsStore newsStore)
        {
            _newsStore = newsStore;
        }

        ...
    }
}

The API project configures the API security in the Startup class in the ConfigureServices method. Firstly CORS is configured, incorrectly in this example as it allows everything. Only the required URLs should be allowed. Then the TokenValidationParameters and the JwtSecurityTokenHandler options are configured. The NameClaimType is configured so that the Name property is set from the token in the HTTP context Identity. This is set and added to the access token on the STS server.

The AddAuthentication is added with the JwtBearer token options. This is configured to accept the token in the query string as well as the header. If the request matches the SignalR Hubs, the token is received and used to validate the request.

The AddAuthorization is added and the policies are defined as required. Then the SignalR middleware is added.

public void ConfigureServices(IServiceCollection services)
{
	var sqliteConnectionString = Configuration.GetConnectionString("SqliteConnectionString");
	var defaultConnection = Configuration.GetConnectionString("DefaultConnection");

	var cert = new X509Certificate2(Path.Combine(_env.ContentRootPath, "damienbodserver.pfx"), "");

	services.AddDbContext<DataEventRecordContext>(options =>
		options.UseSqlite(sqliteConnectionString)
	);

	// used for the new items which belong to the signalr hub
	services.AddDbContext<NewsContext>(options =>
		options.UseSqlite(
			defaultConnection
		), ServiceLifetime.Singleton
	);

	services.AddSingleton<IAuthorizationHandler, CorrectUserHandler>();
	services.AddSingleton<NewsStore>();

	var policy = new Microsoft.AspNetCore.Cors.Infrastructure.CorsPolicy();
	policy.Headers.Add("*");
	policy.Methods.Add("*");
	policy.Origins.Add("*");
	policy.SupportsCredentials = true;

	services.AddCors(x => x.AddPolicy("corsGlobalPolicy", policy));

	var guestPolicy = new AuthorizationPolicyBuilder()
		.RequireClaim("scope", "dataEventRecords")
		.Build();

	var tokenValidationParameters = new TokenValidationParameters()
	{
		ValidIssuer = "https://localhost:44318/",
		ValidAudience = "dataEventRecords",
		IssuerSigningKey = new SymmetricSecurityKey(Encoding.UTF8.GetBytes("dataEventRecordsSecret")),
		NameClaimType = "name",
		RoleClaimType = "role",
	};

	var jwtSecurityTokenHandler = new JwtSecurityTokenHandler
	{
		InboundClaimTypeMap = new Dictionary<string, string>()
	};

	services.AddAuthentication(IdentityServerAuthenticationDefaults.AuthenticationScheme)
	.AddJwtBearer(options =>
	{
		options.Authority = "https://localhost:44318/";
		options.Audience = "dataEventRecords";
		options.IncludeErrorDetails = true;
		options.SaveToken = true;
		options.SecurityTokenValidators.Clear();
		options.SecurityTokenValidators.Add(jwtSecurityTokenHandler);
		options.TokenValidationParameters = tokenValidationParameters;
		options.Events = new JwtBearerEvents
		{
			OnMessageReceived = context =>
			{
				if (context.Request.Path.Value.StartsWith("/loo") &&
					context.Request.Query.TryGetValue("token", out StringValues token)
				)
				{
					context.Token = token;
				}

				return Task.CompletedTask;
			},
			OnAuthenticationFailed = context =>
			{
				var te = context.Exception;
				return Task.CompletedTask;
			}
		};
	});

	services.AddAuthorization(options =>
	{
		options.AddPolicy("dataEventRecordsAdmin", policyAdmin =>
		{
			policyAdmin.RequireClaim("role", "dataEventRecords.admin");
		});
		options.AddPolicy("dataEventRecordsUser", policyUser =>
		{
			policyUser.RequireClaim("role", "dataEventRecords.user");
		});
		options.AddPolicy("dataEventRecords", policyUser =>
		{
			policyUser.RequireClaim("scope", "dataEventRecords");
		});
		options.AddPolicy("correctUser", policyCorrectUser =>
		{
			policyCorrectUser.Requirements.Add(new CorrectUserRequirement());
		});
	});

	services.AddSignalR();

	services.AddMvc(options =>
	{
	   //options.Filters.Add(new AuthorizeFilter(guestPolicy));
	}).AddJsonOptions(options =>
	{
		options.SerializerSettings.ContractResolver = new DefaultContractResolver();
	});

	services.AddScoped<IDataEventRecordRepository, DataEventRecordRepository>();
}

The Configure method in the Startup class of the API defines the SignalR Hubs and adds the Authentication.

public void Configure(IApplicationBuilder app, IHostingEnvironment env, ILoggerFactory loggerFactory)
{
	loggerFactory.AddConsole();
	loggerFactory.AddDebug();

	loggerFactory.AddSerilog();

	app.UseExceptionHandler("/Home/Error");
	app.UseCors("corsGlobalPolicy");
	app.UseStaticFiles();

	app.UseAuthentication();

	app.UseSignalR(routes =>
	{
		routes.MapHub<LoopyHub>("loopy");
		routes.MapHub<NewsHub>("looney");
	});

	app.UseMvc(routes =>
	{
		routes.MapRoute(
			name: "default",
			template: "{controller=Home}/{action=Index}/{id?}");
	});
}

Securing the SignalR client in Angular

The Angular SPA application is secured using the oidc Implicit Flow. After a successful client and identity login, the access token can be used to access the Hub or the API. The Hub is initialized after the client has recieved an access token. The Hub connection is then setup, using the same parameter logic defined on the API server. “token=…” Now each message is sent using the access token.

import 'rxjs/add/operator/map';
import { Subscription } from 'rxjs/Subscription';

import { HttpClient, HttpHeaders } from '@angular/common/http';
import { Injectable } from '@angular/core';
import { Observable } from 'rxjs/Observable';

import { HubConnection } from '@aspnet/signalr-client';
import { NewsItem } from './models/news-item';
import { Store } from '@ngrx/store';
import { NewsState } from './store/news.state';
import * as NewsActions from './store/news.action';
import { Configuration } from '../app.constants';
import { OidcSecurityService } from 'angular-auth-oidc-client';

@Injectable()
export class NewsService {

    private _hubConnection: HubConnection;
    private actionUrl: string;
    private headers: HttpHeaders;

    isAuthorizedSubscription: Subscription;
    isAuthorized: boolean;

    constructor(private http: HttpClient,
        private store: Store<any>,
        private configuration: Configuration,
        private oidcSecurityService: OidcSecurityService
    ) {
        this.actionUrl = `${this.configuration.Server}api/news/`;

        this.headers = new HttpHeaders();
        this.headers = this.headers.set('Content-Type', 'application/json');
        this.headers = this.headers.set('Accept', 'application/json');

        this.init();
    }

    send(newsItem: NewsItem): NewsItem {
        this._hubConnection.invoke('Send', newsItem);
        return newsItem;
    }

    joinGroup(group: string): void {
        this._hubConnection.invoke('JoinGroup', group);
    }

    leaveGroup(group: string): void {
        this._hubConnection.invoke('LeaveGroup', group);
    }

    getAllGroups(): Observable<string[]> {

        const token = this.oidcSecurityService.getToken();
        if (token !== '') {
            const tokenValue = 'Bearer ' + token;
            this.headers = this.headers.append('Authorization', tokenValue);
        }

        return this.http.get<string[]>(this.actionUrl, { headers: this.headers });
    }

    private init() {
        this.isAuthorizedSubscription = this.oidcSecurityService.getIsAuthorized().subscribe(
            (isAuthorized: boolean) => {
                this.isAuthorized = isAuthorized;
                if (this.isAuthorized) {
                    this.initHub();
                }
            });
        console.log('IsAuthorized:' + this.isAuthorized);
    }

    private initHub() {
        console.log('initHub');
        const token = this.oidcSecurityService.getToken();
        let tokenValue = '';
        if (token !== '') {
            tokenValue = '?token=' + token;
        }

        this._hubConnection = new HubConnection(`${this.configuration.Server}looney${tokenValue}`);

        this._hubConnection.on('Send', (newsItem: NewsItem) => {
            this.store.dispatch(new NewsActions.ReceivedItemAction(newsItem));
        });

        this._hubConnection.on('JoinGroup', (data: string) => {
            this.store.dispatch(new NewsActions.ReceivedGroupJoinedAction(data));
        });

        this._hubConnection.on('LeaveGroup', (data: string) => {
            this.store.dispatch(new NewsActions.ReceivedGroupLeftAction(data));
        });

        this._hubConnection.on('History', (newsItems: NewsItem[]) => {
            this.store.dispatch(new NewsActions.ReceivedGroupHistoryAction(newsItems));
        });

        this._hubConnection.start()
            .then(() => {
                console.log('Hub connection started')
            })
            .catch(err => {
                console.log('Error while establishing connection')
            });
    }

}

Or here’s a more simple example with everything in the Angular component.

import { Component, OnInit, OnDestroy } from '@angular/core';
import { Subscription } from 'rxjs/Subscription';
import { Observable } from 'rxjs/Observable';
import { HubConnection } from '@aspnet/signalr-client';
import { Configuration } from '../../app.constants';
import { OidcSecurityService } from 'angular-auth-oidc-client';

@Component({
    selector: 'app-home-component',
    templateUrl: './home.component.html'
})

export class HomeComponent implements OnInit, OnDestroy {
    private _hubConnection: HubConnection;
    async: any;
    message = '';
    messages: string[] = [];

    isAuthorizedSubscription: Subscription;
    isAuthorized: boolean;

    constructor(
        private configuration: Configuration,
        private oidcSecurityService: OidcSecurityService
    ) {
    }

    ngOnInit() {
        this.isAuthorizedSubscription = this.oidcSecurityService.getIsAuthorized().subscribe(
            (isAuthorized: boolean) => {
                this.isAuthorized = isAuthorized;
                if (this.isAuthorized) {
                    this.init();
                }
            });
        console.log('IsAuthorized:' + this.isAuthorized);
    }

    ngOnDestroy(): void {
        this.isAuthorizedSubscription.unsubscribe();
    }

    sendMessage(): void {
        const data = `Sent: ${this.message}`;

        this._hubConnection.invoke('Send', data);
        this.messages.push(data);
    }

    private init() {

        const token = this.oidcSecurityService.getToken();
        let tokenValue = '';
        if (token !== '') {
            tokenValue = '?token=' + token;
        }

        this._hubConnection = new HubConnection(`${this.configuration.Server}loopy${tokenValue}`);

        this._hubConnection.on('Send', (data: any) => {
            const received = `Received: ${data}`;
            this.messages.push(received);
        });

        this._hubConnection.start()
            .then(() => {
                console.log('Hub connection started')
            })
            .catch(err => {
                console.log('Error while establishing connection')
            });
    }
}

Logs on the server

As the application sends the token in the query string, this can be accessed on the server using standard logging. The 3 applications are configured using Serilog and the logs are saved to Seq server and also to log files. If you open the Seq server, the access_token can be viewed and copied.

You can then use jwt.io to view the details of the token.
https://jwt.io/

Or you can use postman to do API calls for which you might not have the authorization or authentication rights. This token will work as long as it is valid. All you need to do, is add this to the header and you have the same rights as the identity for which the access token was created.

You can also view the token in the log files:

2017-10-15 17:11:33.790 +02:00 [Information] Request starting HTTP/1.1 OPTIONS http://localhost:44390/looney?token=eyJhbGciOiJSUzI1NiIsIm...
2017-10-15 17:11:33.795 +02:00 [Information] Request starting HTTP/1.1 OPTIONS http://localhost:44390/loopy?token=eyJhbGciOiJSUzI1NiIsImtpZCI6IjA2RDNFNDZFO...
2017-10-15 17:11:33.803 +02:00 [Information] Policy execution successful.

Due to this, you need to check that the deployment admin, developers, devop people can be trusted or reduce the access to the production scenarios. This has also implications with GDPR.

Links

https://github.com/aspnet/SignalR

https://github.com/aspnet/SignalR#readme

https://github.com/aspnet/SignalR/issues/888

https://github.com/ngrx

https://www.npmjs.com/package/@aspnet/signalr-client

https://dotnet.myget.org/F/aspnetcore-ci-dev/api/v3/index.json

https://dotnet.myget.org/F/aspnetcore-ci-dev/npm/

https://dotnet.myget.org/feed/aspnetcore-ci-dev/package/npm/@aspnet/signalr-client

https://www.npmjs.com/package/msgpack5


Viewing all 357 articles
Browse latest View live